On This Page
Customizing ID Numbers
Note: Creating Custom ID Numbers will update the record IDs moving forward. It will not retroactively change existing records.
- To customize your ID Numbers, click on your profile icon or initials in the top right corner. Then, select Settings from the dropdown menu.
- Click on the General settings tab (if not already selected).
- Record ID formats can be customized by entering a code into the record Number Template field of your choosing.
- The specific codes you can add to these text fields to customize the ID number templates are as follows:
- {{yy}} - 2 number year (Example: 14, 15, 16)
- {{yyyy}} - 4 number year (Example: 2014, 2015, 2016)
- {{d}} - numeric day (Example: 1, 2, 3)
- {{dd}} - numeric day (Example: 01, 02, 03)
- {{m}} - numeric month (Example: 1, 2, 3)
- {{mm}} - numeric month (Example: 01, 02, 03)
- {{jobid}} - auto incremented job id (Available for Job)
- {{contactid}} - auto incremented invoice id (Available for Contact)
- {{taskid}} - auto incremented invoice id (Available for Task)
- {{estimateid}} - auto incremented estimate id (Available for Estimate)
- {{budgetid}} - auto incremented invoice id (Available for Budget)
- {{documentid}} - auto incremented invoice id (Available for Document)
- {{workorderid}} - auto incremented invoice id (Available for Work Order)
- {{materialorderid}} - auto incremented invoice id (Available for Material Order)
- {{invoiceid}} - auto incremented invoice id (Available for Invoice)
- {{creditmemo}} - auto incremented credit memo id (Available for Credit Memo)
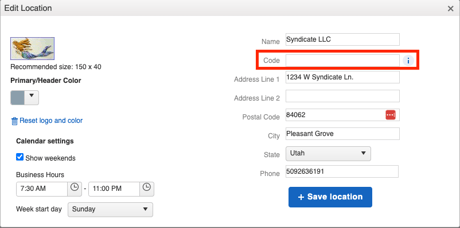
- {{locationcode}} - the location code for this location. Location codes are set in the Company tab of your Settings.

Note: You can add your own text to a custom ID number.
Example ID Numbers
- Contact ID showing the initials of your company followed by default Contact ID number followed by the year using the four number year format. Just delete the extra spaces between the curly brackets. *In this example, company initials are JN.
Code: JN-{{contactid}} -{{yyyy}}
How it appears: #JN-1058-2020 - Task ID showing location name to differentiate between two locations followed by default Task ID number. Just delete the extra spaces between the curly brackets. *In this example, JobNimbus is used as the company name.
Code: {{locationcode}} {{taskid}}
How it appears: #JobNimbus1009 - Task ID showing Day, Month, and two number year format followed by default Task ID number. Just delete the extra spaces between the curly brackets.
Code: {{dd}} {{mm}}{{yy}} -{{taskid}}
How it appears: #020520-1050 - Invoice ID showing INV before default Invoice ID number to specify it is an invoice. Just delete the extra spaces between the curly brackets.
Code: INV{{invoiceid}}
How it appears: INV1012
Manually Assigning Job IDs
- To manually assign Job IDs, first click on your profile icon or initials in the top right corner. Then, select Settings from the dropdown menu.
- On the General Settings page, toggle the Let me assign Job numbers manually option on.
- Make sure to click the blue +Save preferences button at the bottom of the Preferences section after making your changes.
- Doing this will remove the autogenerated Job number fields and allow you to enter your own number when creating a Job in JobNimbus.
The number you create cannot match another existing record's ID. A warning will appear if the system recognizes that the ID is already assigned.