How Do I Create a Financial Template?
Templates can customize the design of your financial documents.
This article contains information about creating financial templates in the Legacy Financials Experience. To create templates in the New Sales Experience, click here.
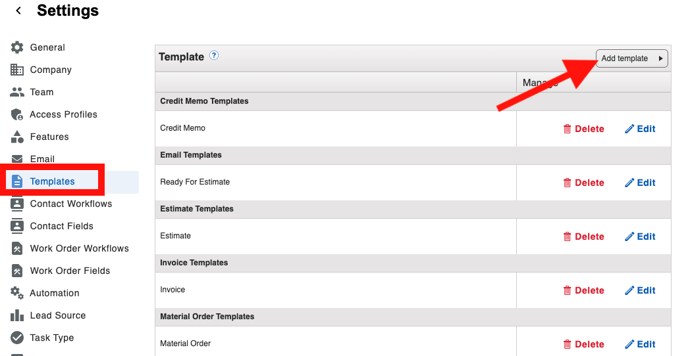
To access your templates:
- Click on your profile icon or initials in the top right corner.
- Select Settings from the drop-down menu.
- Within the Settings menu, open the Templates tab.
To add a new template, click on the Add Template button.
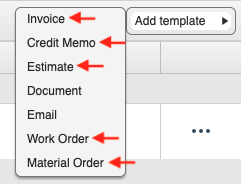
Choose between Invoice, Credit Memo, Estimate, Work Order (if enabled), or Material Order (if enabled) from the drop-down menu.
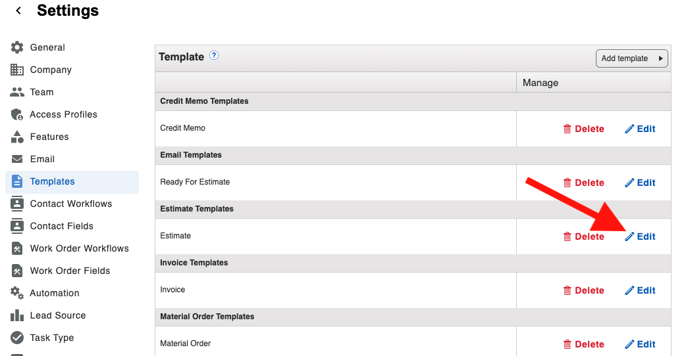
To edit an existing template, click on the blue "Edit" button to the right of its title.
Adding or editing a template will pull up the Template Builder. When you first create an Estimate or Invoice template, you are offered the choice between different designs, which determines how the information will format.
In the Template Builder for financial documents, such as Estimates and Invoices, the builder is split into two sections:
- The top section contains template information, such as the template title and the title for the Customer Note.
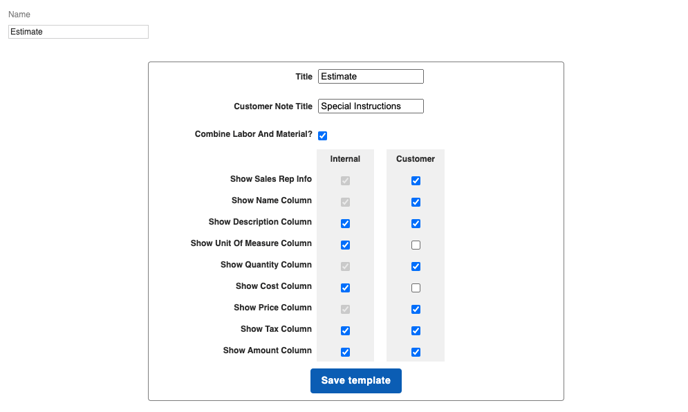
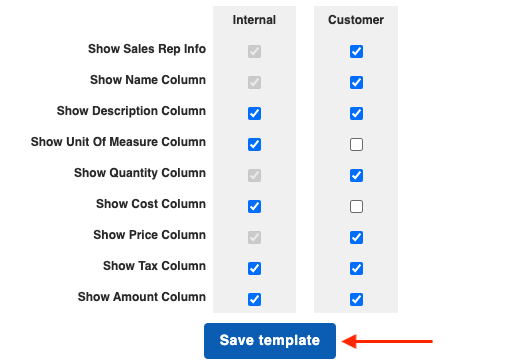
You also have the option to adjust what is shown both internally (to your team) and externally (to your customers).
- Show Sales Rep Info - Reveals the assigned Sales Rep's information.
- Show Name Column - Shows the column that contains the name of the product or service in the line items.
- Show Description Column - Makes the description of the line item (product or service) visible.
- Show Unit of Measure Column - Reveals the unit of measurement for the line item.
- Show Cost Column - Shows the column with the cost to your company for the product or service.
- Show Price Column - Shows the column with the price your customer is paying for the product or service.
- Show Tax Column - Makes the tax information visible.
- Show Amount Column - Reveals the total dollar amount for each product or service.
- In the bottom section of the Template Builder, you can modify the information in the various sections of the financial document.
- To make changes, hover over the area and click inside the gray box shown. A dotted outline will appear around the section you can edit.
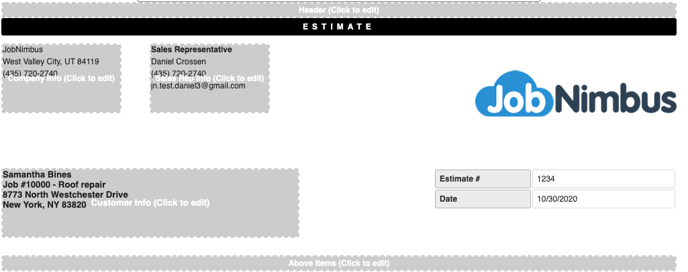
Clicking on a boxed section will pull up the content editor:
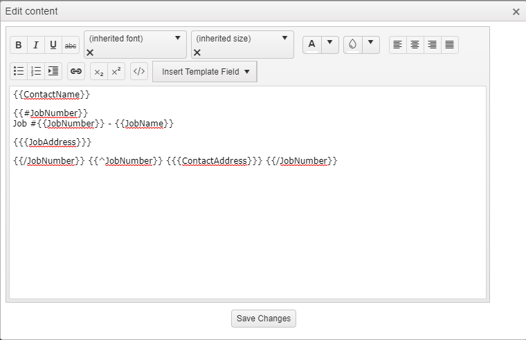
In the top pane of the content editor, you can change the way your font looks. You can also use the "Insert Template Field" drop-down to choose different fields to add information from your Contacts and Jobs. Details about Template Fields can be found here.
Once you are done editing the section, click the "Save Changes" button at the bottom.
After you have finished customizing the template entirely, click on the blue "Save Template" button located in the top section.
To copy an existing template, click on the 3 dots to the right of the title and select Duplicate.
