On This Page
Estimates on iOS
- Navigate to the Job that you want to create an estimate for.
- Once there, tap the Estimates option under files.
- Here, you can view existing Estimates or create a new Estimate.
- To create a new Estimate, tap the + button at the top of the screen and select Estimate.
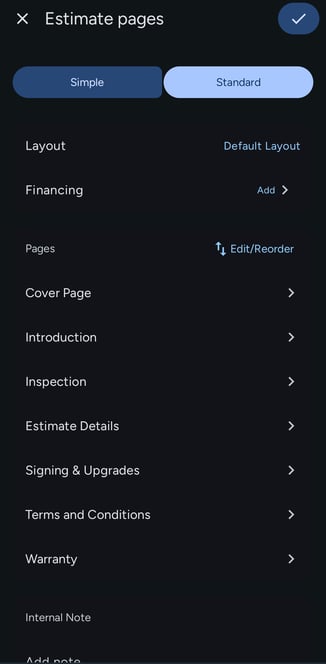
- Select the Layout you would like to use.
- Here, you can select either a Simple Estimate or a Standard Estimate by toggling between the two options.
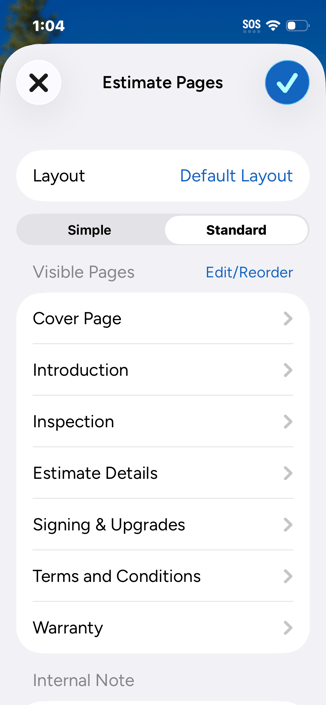
- Tap the page you would like to add information to and fill out the fields as needed. The pages are listed below.
Cover Page
-
On your Estimate Cover Page, you can add a cover photo and certification logo, and add or edit customer details.
Introduction
-
Enter an Introduction message or apply a template.
Inspection
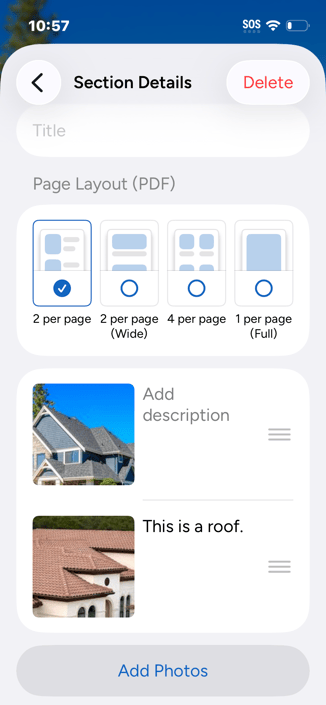
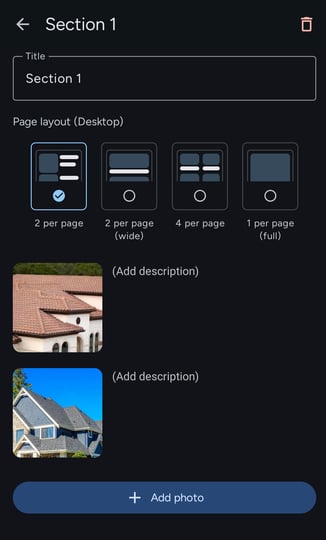
- Add Inspection photos and descriptions of your findings. You can also customize the layout of the photos.
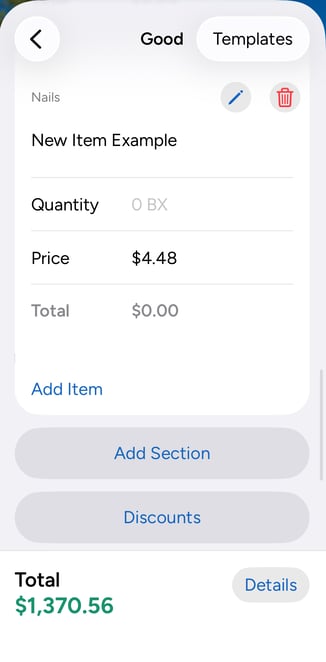
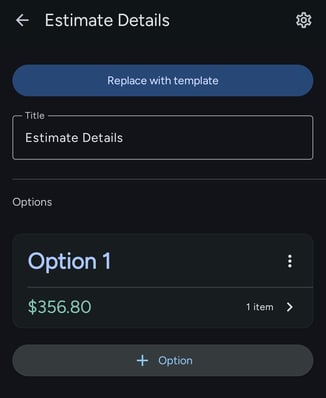
Estimate Details
- Add sections and line items, and create multiple options for your customers to choose from.
- To add additional options, tap the + Option button. You can also use a template by tapping the Use Template button.
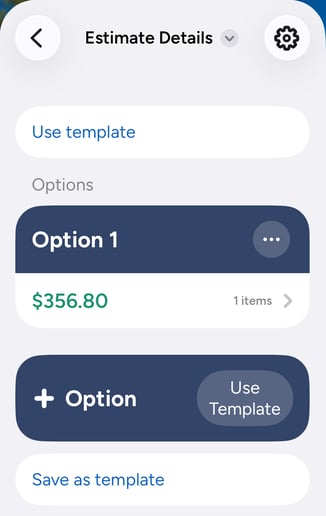
- Within an option, you can apply a template or include items from an option you have already created by selecting the dropdown beneath the option name.
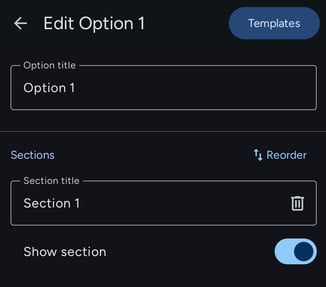
- Under Sections, you can reorder sections to put them higher or lower on the list, input a section title, and toggle the show section option off or on.
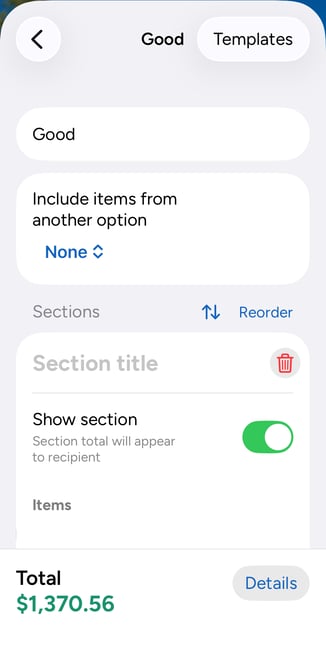
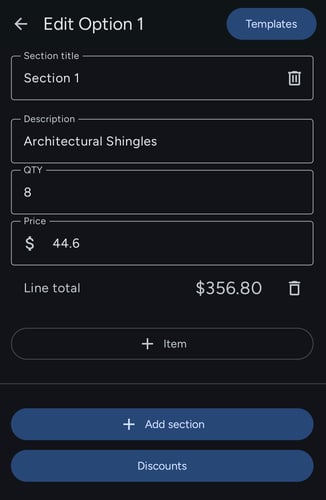
- Scroll further down the page to view the items in a section.
- Tap the pencil icon to edit an individual line item, or the trash can icon to delete it.
- Tap the Add Item button to add additional line items, the Add Section button to add an additional section, and the Discounts button to create a discount and toggle the option to show discounts on the final Estimate PDF.
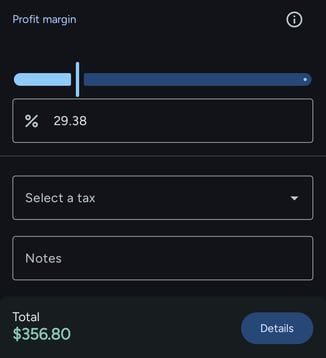
- Beneath the sections, you will find your Profit Margin, which you can edit by typing in the percentage in the the text box, as well as the Tax dropdown.
- At the bottom of the page, you can tap the Notes text box to add notes to your Estimate and select Save as Template to save the option you have created as a template for future use.
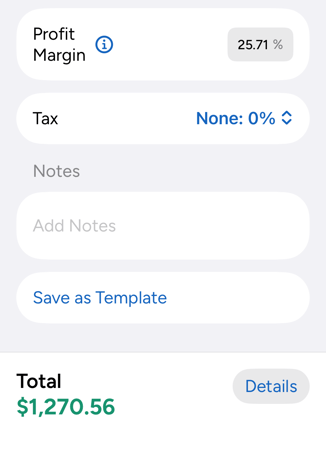
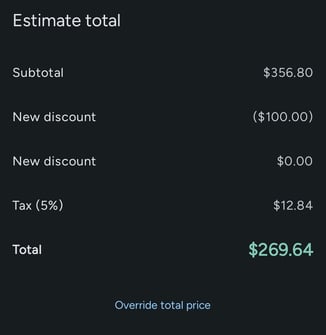
- To view the option's totals, tap the Details button in the bottom right corner. Here, you will see the subtotals, discounts, taxes you have applied, and the total.
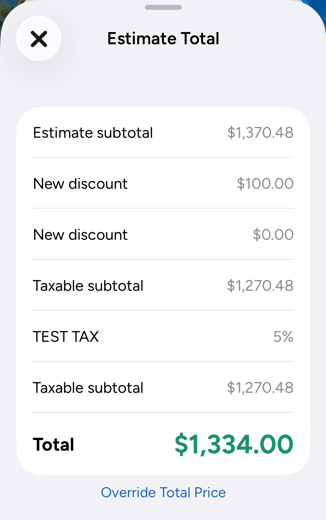
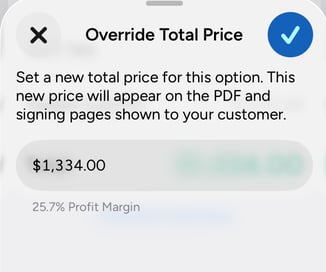
- Tap the Override Total Price button at the bottom of the Estimate Total window to manually enter a total price. Tap the check mark in the top right corner to save the overridden price.
- Once you have finished entering your line items and options, tap the back button to return the the Estimate Details and tap it again to return to the other Estimate pages.
- Estimate details will automatically be saved.
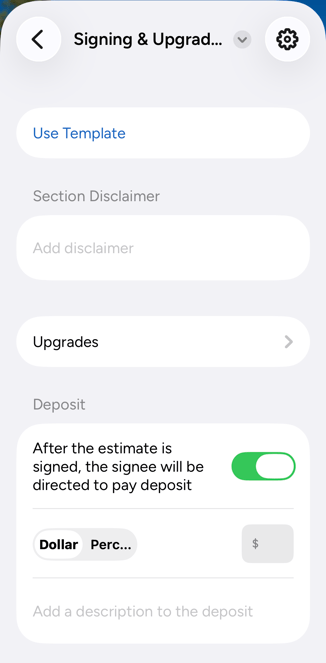
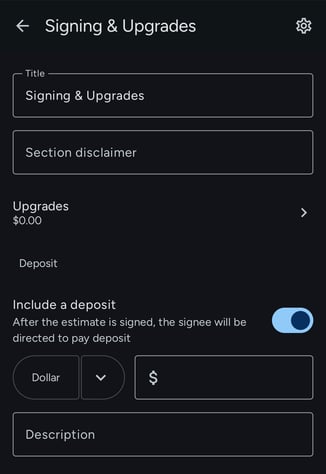
Signing & Upgrades
- On the Signing & Upgrades page, you can use a Template, add disclaimers and upgrades, and add a deposit amount.
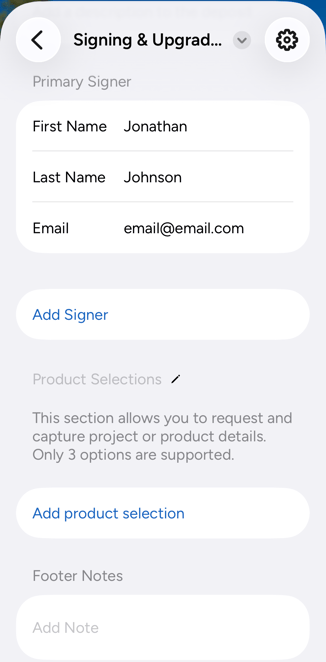
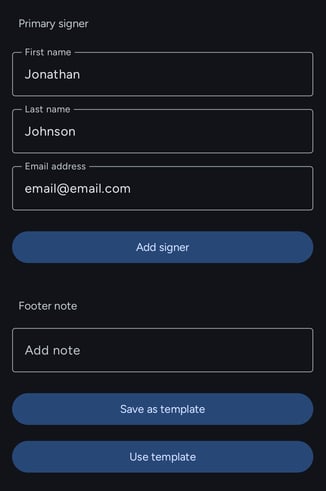
- Scroll further down on the Signing & Upgrades page to view the Primary Signer's information, add and additional signer, add product selections, enter footer notes, and save your page as a template.
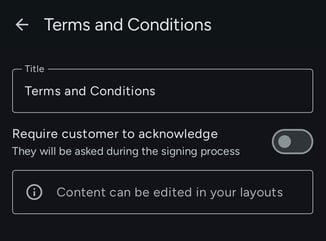
Terms and Conditions
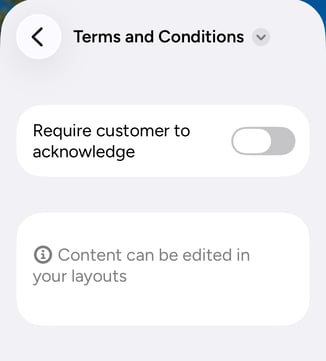
- On the Terms and Conditions page, you can toggle the option to mark the page as required for the customer to acknowledge it.
- Note: Content of the Terms and Conditions page must be edited in layouts in Estimates Settings by an admin user on the web app.
- Note: Content of the Terms and Conditions page must be edited in layouts in Estimates Settings by an admin user on the web app.
Warranty
- On the Warranty page, you can view any warranty details entered in the Estimate Layout, as well as the Warranty start date and Job address.
- Note: Content of the Terms and Conditions page must be edited in layouts in Estimates Settings by an admin user on the web app.
Estimates on Android
- Navigate to the Job that you want to create an estimate for.
- Once there, tap the + button and select Estimate.
- To view or edit an existing Estimate, tap the Financials option under Files on the Job.
- Select the Layout you would like to use for your new Estimate.
- Here, you can select either a Simple Estimate or a Standard Estimate by toggling between the two options.
- Tap the page you would like to add information to and fill out the fields as needed. The pages are listed below.
Cover Page
-
On your Estimate Cover Page, you can add a cover photo and certification logo, and add or edit customer details.
Introduction
-
Enter an Introduction message or apply a template.
Inspection
- Add Inspection photos and descriptions of your findings. You can also customize the layout of the photos.
Estimate Details
- Add sections and line items, and create multiple options for your customers to choose from.
- To add additional options, tap the + Option button. You can also use a template by tapping the Replace with Template button.
- Within an option, you can apply a template or include items from an option you have already created by selecting the dropdown beneath the option name.
- Under Sections, you can reorder sections to put them higher or lower on the list, input a section title, and toggle the show section option off or on.
- Scroll further down the page to view the items in a section.
- Tap the pencil icon to edit an individual line item, or the trash can icon to delete it.
- Tap the Add Item button to add additional line items, the Add Section button to add an additional section, and the Discounts button to create a discount and toggle the option to show discounts on the final Estimate PDF.
- Beneath the sections, you will find your Profit Margin, which you can edit by typing in the percentage in the the text box, as well as the Tax dropdown.
- At the bottom of the page, you can tap the Notes text box to add notes to your Estimate and select Save as Template to save the option you have created as a template for future use.
- To view the option's totals, tap the Details button in the bottom right corner. Here, you will see the subtotals, discounts, taxes you have applied, and the total.
- Tap the Override Total Price button at the bottom of the Estimate Total window to manually enter a total price. Tap Confirm to save the overridden price.

- Once you have finished entering your line items and options, tap the back button to return the the Estimate Details and tap it again to return to the other Estimate pages.
- Estimate details will automatically be saved.
Signing & Upgrades
- On the Signing & Upgrades page, you can add disclaimers and upgrades, and add a deposit amount.
- Scroll further down on the Signing & Upgrades page to view the Primary Signer's information, add and additional signer, enter footer notes, apply a an existing template, and save your page as a template.
Terms and Conditions
- On the Terms and Conditions page, you can toggle the option to mark the page as required for the customer to acknowledge it.
- Note: Content of the Terms and Conditions page must be edited in layouts settings by an admin user on the web app.
- Note: Content of the Terms and Conditions page must be edited in layouts settings by an admin user on the web app.
Warranty
- On the Warranty page, you can view any warranty details entered in the Estimate Layout, as well as the Warranty start date and Job address.
- Note: Content of the Terms and Conditions page must be edited in layouts settings by an admin user on the web app.