![JN_Logo_Long-White@1x.png]](https://support.jobnimbus.com/hs-fs/hubfs/JN_Logo_Long-White@1x.png?height=40&name=JN_Logo_Long-White@1x.png)
On This Page
This article covers the Image Editor available from within New Sales Experience Estimates only.
Opening the Image Editor
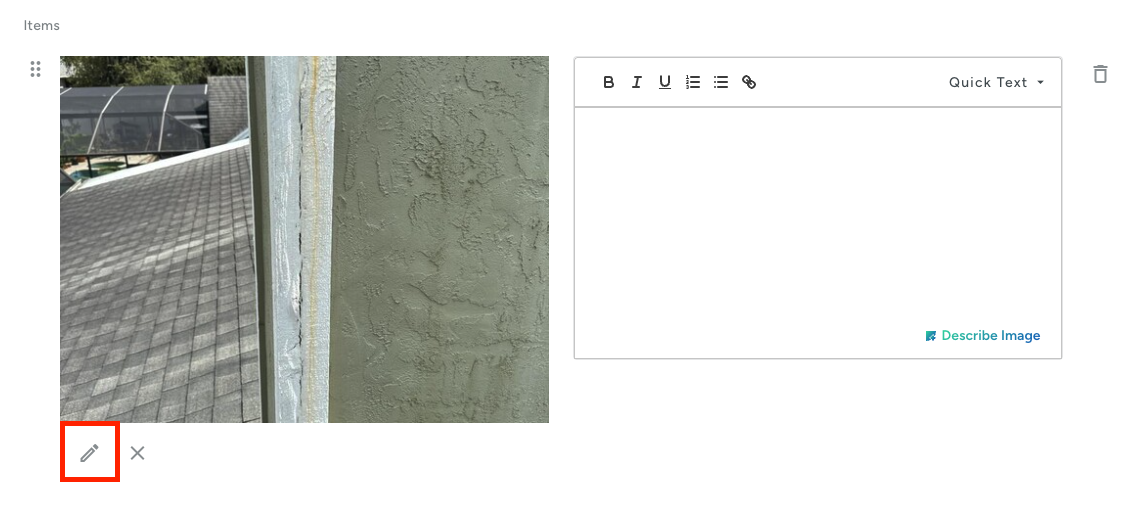
You can edit any photo you've added to the Inspection page or Cover page of an Estimate. Check out How Do I Create an Estimate in JobNimbus? to learn how to add photos.
- Open the Estimate and select the page you want to edit photos on from the Pages list on the left.
- Select the pencil icon under the photo you want to edit.
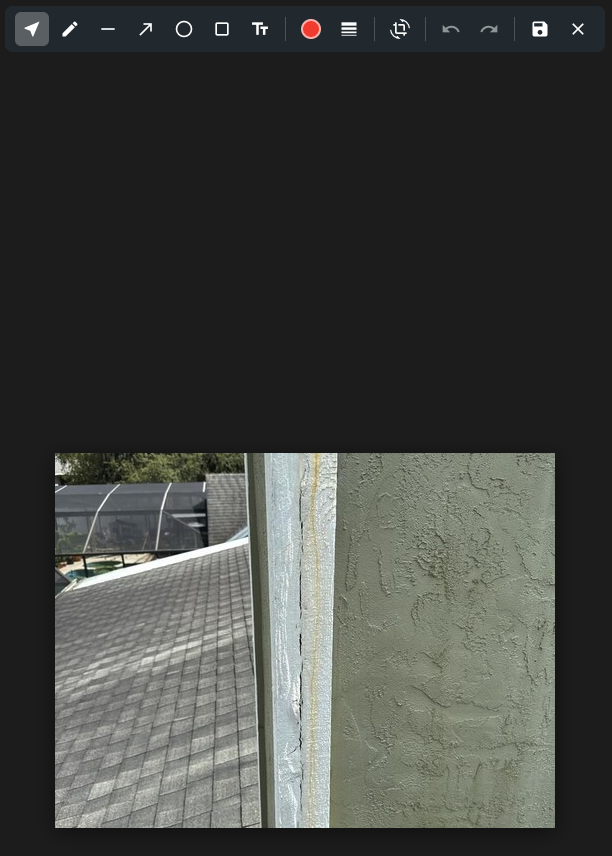
The photo opens in the image editor, with the toolbar across the top of the screen. The Select tool is active when the editor opens.
To edit photos on a Job's Photos tab instead, check out How Do I Take, Upload, and Edit Photos?
Cropping and Rotating a Photo
Cropping removes all markup on the photo, and this can't be undone. Crop and rotate the photo first, then add your annotations.
- Select the Crop and Rotate icon in the toolbar. You can also type the letter x to start using this tool.

- If the photo already has markup, a Clear annotations? message appears. Select Continue to clear the markup, or Cancel to keep it.
- Drag the photo to position it inside the crop frame.
- Use the Zoom slider to zoom in or out, or select Fit or Fill.
- Select the rotate icons next to 90° to turn the photo a quarter turn, or use the minus and plus icons next to Fine for small adjustments.
- Select the checkmark to apply the crop, or the X to cancel.
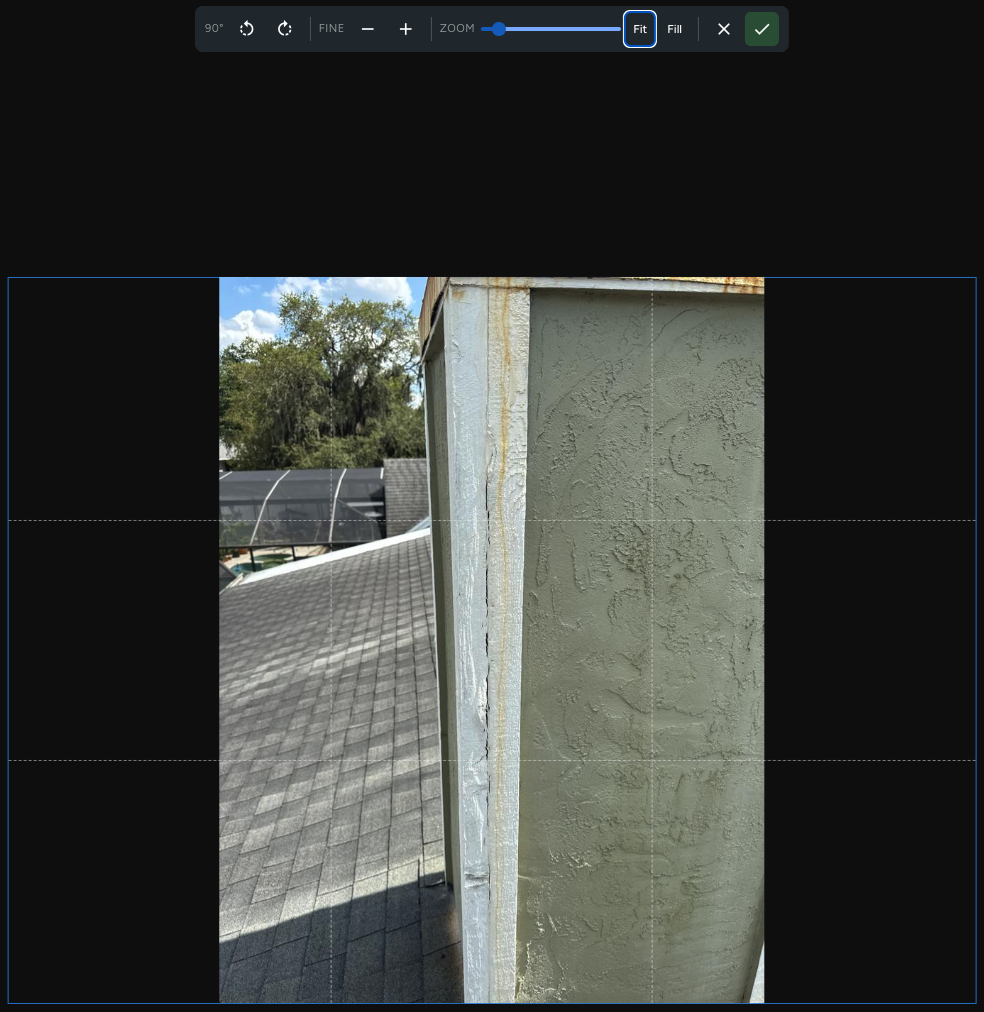
If you zoom out until the photo is smaller than the crop frame, the extra space shows as a white border.
Annotating a Photo
Each tool in the toolbar adds a different kind of markup. Hover over a tool to see its name and keyboard shortcut.
- Select (V): Select a markup to move it. Drag a corner handle to resize it, or drag the handle above it to rotate it.
- Pencil (P): Draw freehand.
- Line (L): Draw a straight line.
- Arrow (A): Draw an arrow to point at damage.
- Circle (C): Draw a circle or oval.
- Rectangle (R): Draw a box.
- Text (T): Add a typed label.
- Color: Choose the color for your markup.
- Stroke width: Choose Thin, Medium, or Thick lines.
- Undo and Redo: Step back or forward through your changes.
To add markup to a photo:
- Select a tool from the toolbar.
- Click and drag on the photo to draw. With the Text tool, click where the label should go and type.
- Choose the Select tool and select a markup to move or resize it.
Saving Your Changes
- Select the Save icon in the toolbar.

- Wait for Saving... to finish. The editor closes, and a Saved! message appears briefly on the screen.
The edited photo shows on the page and in the Estimate when you select Review & Share.
To leave the editor without saving, select the X icon.