Note: A Solo account is required in order to integrate with JobNimbus.
Click here to book a demo or call (385) 367-2461 to speak with a member of their sales team.
Enabling the Solo Integration in JobNimbus
- In your JobNimbus account, click on your profile icon or initials in the top right corner.
- Select Settings from the dropdown menu.
- In the Settings menu on the left, select Integrations, then select API.

- Click on the New API key button.

- This will pull up the option to create a new API key.

Once here:
- Choose Solo from the drop-down menu under the "Description" column.
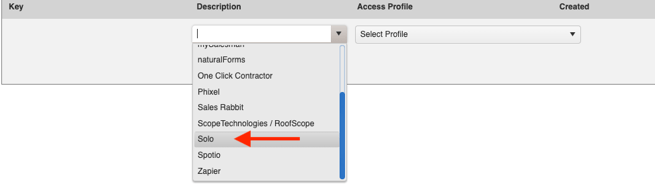
- Select a profile with full access (ex: "Owner") under the Access Profile column.

- Click Save
- Copy the newly created key (you will use this during step 5 of the Solo setup to follow).

In Your Solo Account
Important:
Each event requires its own webhook; configurations are based on whether you primarily use Jobs or Contacts.
For Contacts, click here.
For Jobs, click here.
For Contacts
- Click on the menu (three horizontal lines) at the top left corner of your account.

- Select Company from the side panel and then choose Integrations.

- From here, select the "Webhooks" dropdown.

- Click the "New Webhook" button.

- Once you are here:
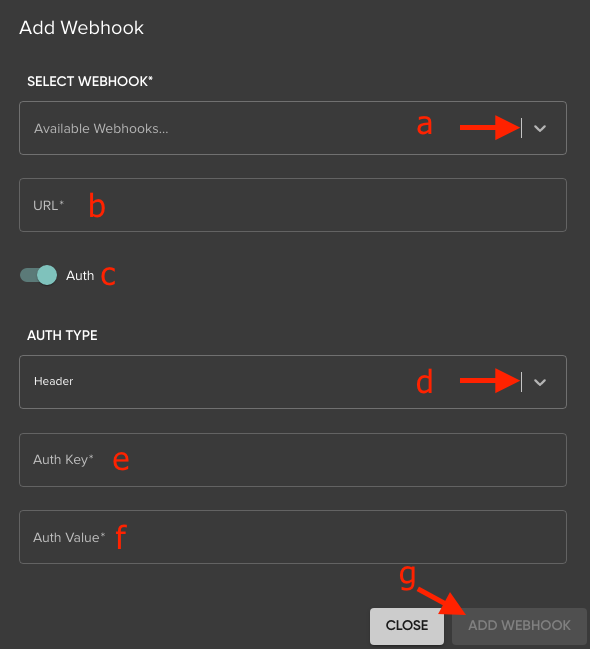
- In the Available Webhooks dropdown, choose an event (we currently support "proposal sent" and "customer created").
- In the URL field, copy and paste the appropriate italicized link (below):
- Proposal sent → https://app.jobnimbus.app/api2/solo/contact/estimate
Customer created → https://app.jobnimbus.com/api2/solo/contact
- Proposal sent → https://app.jobnimbus.app/api2/solo/contact/estimate
- Toggle the "Auth" switch on.
- In the Auth Key field, manually type the word "authorization".
- In the Auth Value field, paste the JobNimbus API Key you created and copied during step 4 of the JobNimbus setup above.
- Click Add Webhook when finished.
For Jobs
- Click on the menu (three horizontal lines) at the top left corner of your account.
- Select Company from the side panel and then choose Integrations.
- From here, select the "Webhooks" dropdown.
- Click the "New Webhook" button.
- Once you are here:
- In the Available Webhooks drop-down, choose an event (we currently support "proposal sent" and "customer created").
- In the URL field, copy and paste the appropriate italicized link (below):
- Contact created → https://app.jobnimbus.com/api2/solo/contact
Proposal sent →https://app.jobnimbus.app/api2/solo/job/estimate
Customer created → https://app.jobnimbus.com/api2/solo/job
- Contact created → https://app.jobnimbus.com/api2/solo/contact
- Toggle the "Auth" switch on.
- Under Auth Type, select "Header" from the dropdown.
- In the Auth Key field, manually type the word "authorization".
- In the Auth Value field, paste the JobNimbus API Key you created and copied during step 4 of the JobNimbus setup above.