- Help Center
- Integrations
- Accurence
-
Learning & Training Resources
-
New Sales Experience
-
JobNimbus Payments
-
Quickstart
-
Boards
-
Engage
-
Contacts & Jobs
-
Mobile App
-
Automations
-
Calendar & Tasks
-
Reports
-
Dashboard
-
Financials
-
QuickBooks
-
Integrations
-
Settings
-
Roofer Marketers
-
Additional Resources
-
Events
-
Industry Resources
-
App Status
-
Suggestions
-
Troubleshooting
-
WePay
-
Using JobNimbus
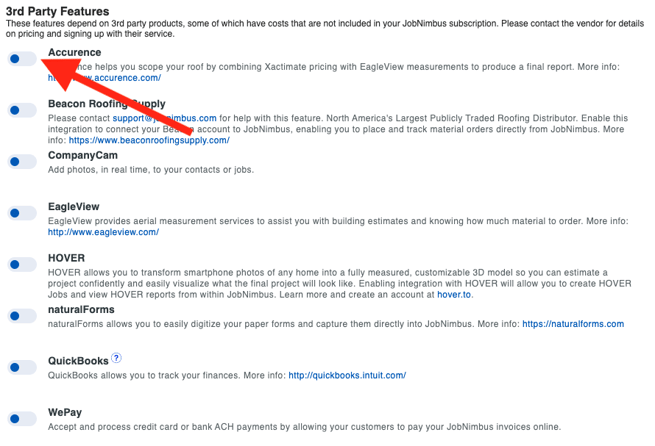
How Do I Enable the JobNimbus Integration With Accurence?
Accurence is a 3rd party feature you'll need to enable through your JobNimbus Settings.
To enable Accurence:
- Click on your profile icon or initials in the top right corner
- Select Settings from the drop-down menu
- Within the Settings menu on the left, open the Features tab
- Under the "3rd Party Features" section, toggle the switch next to Accurence
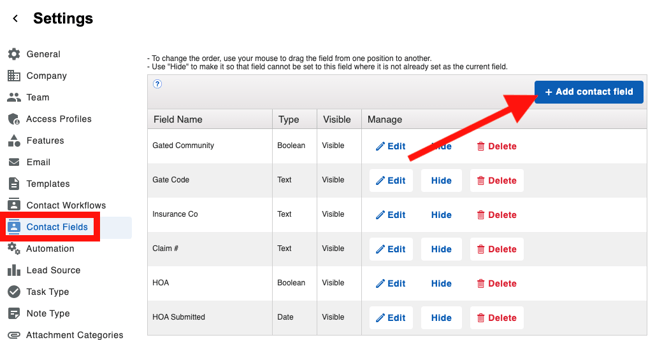
For the integration to work correctly, Accurence requires two specific Custom Fields to be mapped in JobNimbus for Contacts or Jobs (depending on whether Jobs are enabled under your Features tab). In this specific setup example, we will be using Contact Fields.
To create the Custom Fields:
- In your settings, open the Contact Fields tab from the lefthand menu
- Select the blue +Add contact field
3. Name this field "Claim Number" and assign it to the Number Type
4. Click +Save
5. Repeat Step 2 to add another field
6. Name this field "Date of Loss" and assign it to the Date Type
7. Click +Save
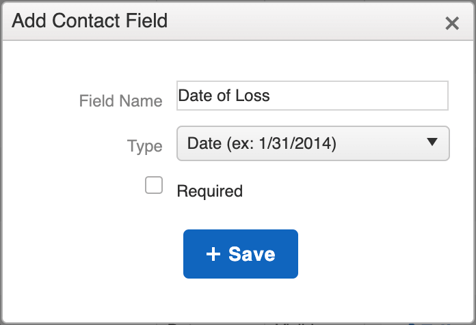
In order for the Accurence integration to work correctly, the "Date of Loss" and "Claim Number" Custom Fields must not be hidden.
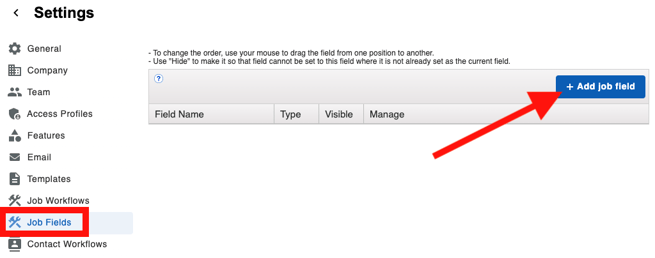
If Jobs is enabled, the previous steps will need to be repeated for Job Fields using the same field names and types.
Mapping the Custom Fields to Accurence
- Navigate to the Accurence tab in your Settings
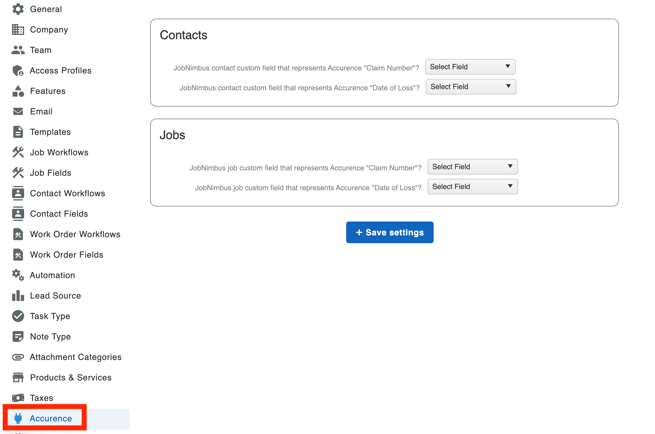
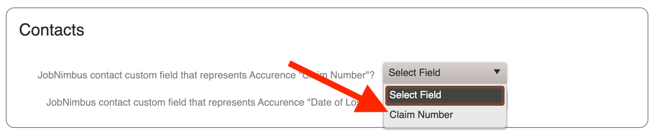
- From the drop-downs under Contact (or Jobs if you have it enabled), select the corresponding custom fields for "Claim Number" and "Date of Loss"
- Select "Save Settings"