On This Page
Enabling QXO
- Click on your profile icon or initials in the top right corner.
- Select Settings from the dropdown menu.
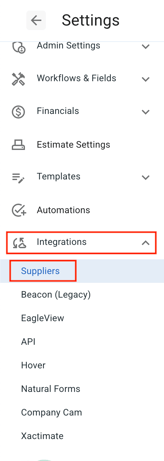
- Within the Settings menu on the left, select the Integrations tab, then select Suppliers.
- JobNimbus will then direct you to the Suppliers list. If you have not yet connected any suppliers, you will see the page below. Select the Connect QXO button.

- If you already have one or more suppliers added to your JobNimbus account, select the QXO tab. Then, select the Connect QXO Account button.
- Input your QXO account login credentials when prompted.

- Once you have logged in, follow the steps below.

- Select the QXO account you want to connect to your JobNimbus location.
- Select the Branch for that location.
- Select a Job Account.
- Next, select Import Templates to import your Templates into JobNimbus. This will automatically sync your QXO Products with JobNimbus.
- Once you click the Import Templates button, you will see the following message.

- In general, imports take under 3 minutes to complete. You do not need to stay on this page during the import as it will continue to work in the background.
Note: Templates can only be imported once. If you make an update to a template in QXO, the update will not reflect in JobNimbus. Instead, you will need to create a new template in QXO and import it.
Note:
- The Material Orders feature in JobNimbus will automatically be enabled when you connect with QXO.
- The Cost for your QXO Products will automatically update in real-time when creating an Estimate or Material Order. However, please note that the Price column in your Products and Services will display the price of the Product when it was first synced to your JobNimbus account.
- If you wish to edit the Price, you can manually update the Price column to reflect the amount you wish to charge.