How Do I Enable the Legacy SRS Distribution and Import My Templates?
Learn how to enable the legacy SRS integration and import your templates in JobNimbus.
Note: This article applies to Legacy Financials only. For information on enabling SRS Distribution with the New Sales Experience, click here.
On This Page
Enabling SRS Distribution
- Click on your profile picture or initials in the top right corner and select Settings from the dropdown menu.
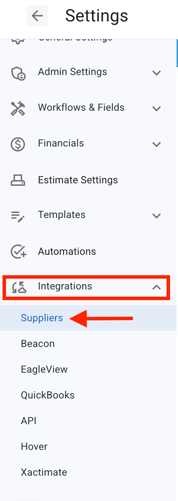
- Within the Settings menu on the left, select Integrations, then Suppliers.

- JobNimbus will then direct you to the Suppliers list. Select the SRS Distribution (Legacy) tab. Then, select the Connect SRS Distribution (Legacy) Account button.

-
Input your Customer Code, a recent invoice number, and Invoice date.

- Select Validate.
Invoice date must be older than 2 days in order for the account validation to work.
- Once you have validated your account, follow the steps below.

- Select the SRS account you want to connect to your JobNimbus location.
- Select the Branch for that location.
- Select a Job Account.
- Next, select Import Templates to import your Templates into JobNimbus. This will automatically sync your SRS Products with JobNimbus.
- Once you click the Import Templates button, you will see the following message.

-
- In general, imports take under 3 minutes to complete. You do not need to stay on this page during the import as it will continue to work in the background.
Note: Templates can only be imported once. If you make an update to a template in RoofHub, the update will not reflect in JobNimbus. Instead, you will need to create a new template in RoofHub and import it.