![JN_Logo_Long-White@1x.png]](https://support.jobnimbus.com/hs-fs/hubfs/JN_Logo_Long-White@1x.png?height=40&name=JN_Logo_Long-White@1x.png)
On This Page
Pinned fields show in a row at the bottom of the Job header. Your pins are saved to your user profile, so the same fields show on every Job you open, on any device.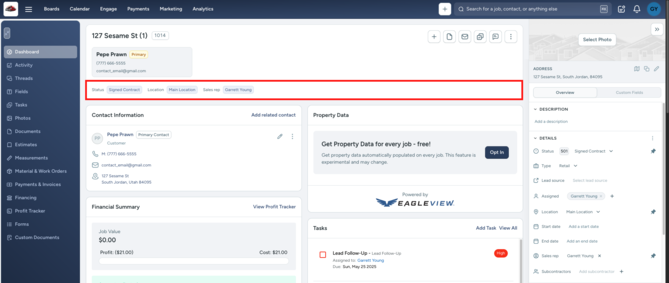
Pins are set per user and don't change what your team members see. If a team member's header shows different fields, they've pinned their own set.
Pinning a Field
You can pin standard Job fields and Custom Fields.
- Open a Job.
- Select the Overview tab or the Custom Fields tab in the Job details panel on the right side of the page.
- Hover over the field you want to pin, then select the pin icon.
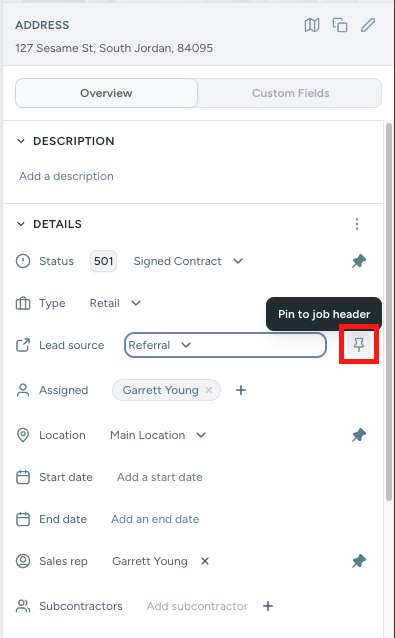
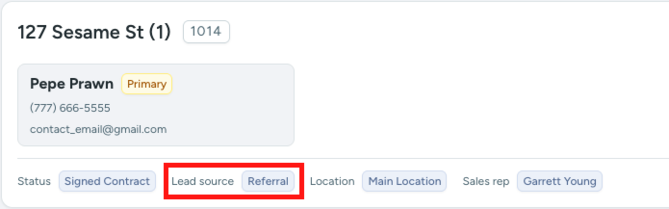
The field now shows in the pinned row of the Job header, on every Job you open. Pinned fields will appear in the same order they are listed in the Job Details sidebar.
Unpinning a Field
- Find the field you want to remove from the header in the Job details panel on the right side of the page.
- Select the pin icon next to it.
The field is removed from your header on every Job. The field and its value stay on the Job.
Default Pinned Fields
If you've never pinned a field, your header shows Status, Location, and Sales Rep. If your account has a Customer Option Selections Custom Field, it's pinned by default too.
Once you pin or unpin any field, your own selection is added to the existing pinned fields.
To learn more about the rest of the Job page, check out how to navigate Jobs. To add new fields you can pin, check out how to create Custom Fields.