![JN_Logo_Long-White@1x.png]](https://support.jobnimbus.com/hs-fs/hubfs/JN_Logo_Long-White@1x.png?height=40&name=JN_Logo_Long-White@1x.png)
On This Page
Note: Your Contacts or Jobs must have a valid property address entered for the integration to function properly.
Creating an Estimate with QXO
- Navigate to a Job and select the Financials tab.
- Click the +Create button at the top of the page.
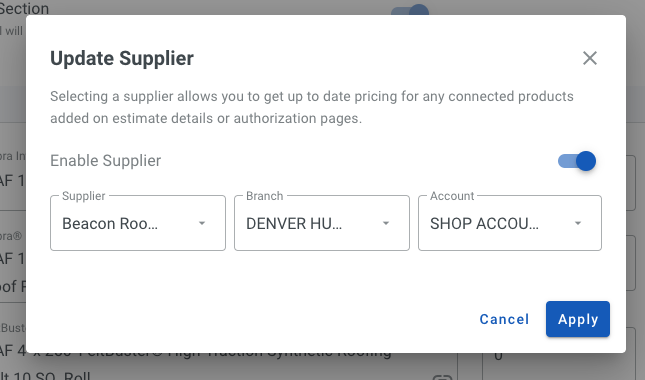
- Select the Connect Supplier button at the top right of the Estimate page.

- Select QXO from the Supplier dropdown menu, the desired Branch from the Branch dropdown, and the Account from the Account dropdown.
-
- If you have imported any templates, select one from the Use Template dropdown menu.
- To Add items, start typing in a product name in the Item text field.
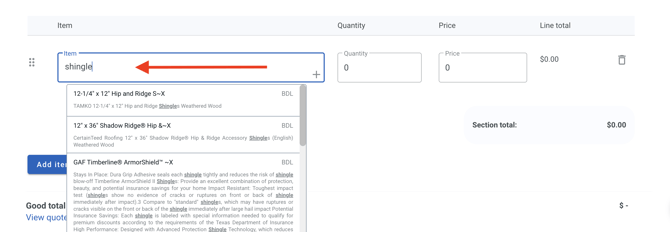
- An item will display a default price when entered, which is the median price of the item options available.
- This will update to the item's actual price once a specific item option has been selected.
- Once you have added the desired items, you can move on to building the rest of your Estimate.
Note: Product images now display alongside each result in the supplier catalog search, making it easier to confirm you've selected the right item.
Updating Supplier Pricing on an Estimate
JobNimbus checks QXO's live pricing when you add or update a linked item on an Estimate, and again if you reopen a saved Estimate for editing. If the price has changed, JobNimbus shows a message with options on how to handle the changes with 3 options:
- Update material costs but keep total price the same
- Your margin will change to address this.
- Update the total price
- Material costs will change but margin will stay the same.
- Do not update pricing
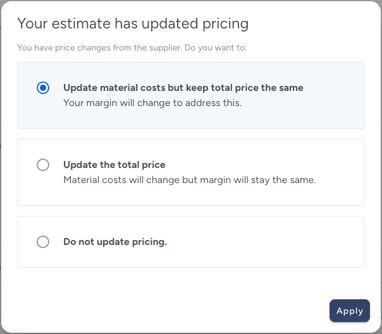
Note: This only applies to items linked to a connected supplier account. Manually entered Products & Services items, and items from a non-integrated supplier, will not trigger this modal.
Converting an Estimate to a Material Order
- On the Financials tab under the Job, select the three dots next to the Estimate you want to convert.
- Under the Convert to section, select Material Order.
- You will then be taken to the Create Material Order screen.
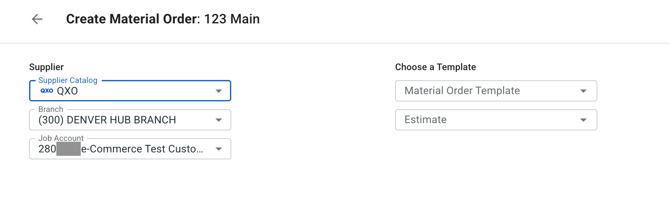
- Make any changes you would like to make by updating the information in the Line Items.
- At the bottom of the page, set the Delivery Address, the Requested Delivery Date and Time, and the Shipping Method.
- The Delivery Address will automatically fill in the Job address, but you can edit this if needed.
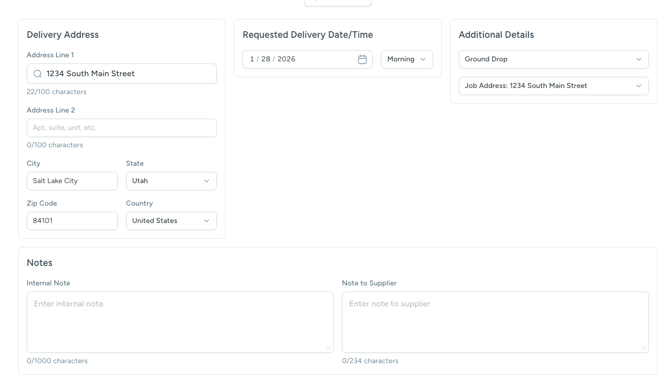
- The Delivery Address will automatically fill in the Job address, but you can edit this if needed.
- Click Place Order in the top right corner.
- Once a QXO material order reaches Invoiced status in JobNimbus, the system automatically imports both the proof of delivery photos and the final invoice into the order's Documents tab.
- If photos are visible in QXO's portal but haven't appeared in JobNimbus, check whether the order has advanced to Invoiced status. Photos won't pull until that status is reached.
Tips:
- A successful order will take you to a preview of the Material Order and in the Activity show you a Status of Order Received.
- Once the order is placed, you will receive a confirmation email from QXO with the details. The chosen Material Order delivery date will the display on your Calendar within JobNimbus.