Sales Manager Assigns Canvassers to an Area on a Map
Now that you have had an opportunity to set up the integration between the SalesRabbit+JobNimbus mobile app, you may be ready for your sales staff or canvassers to get out and start knocking on doors. To do so, you will want to assign them to an area to canvas via the Sales Hub within the SalesRabbit web app:
- Login to your SalesRabbit account.
- Within the left-hand navigation menu, select the Sales Hub drop-down menu.
- Select Map.
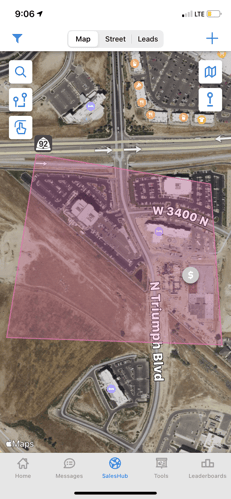
- Navigate and orient the map to the area or neighborhoods that you would like your team to canvass.
- In the "Draw New Area" menu, select Draw.
- Using your mouse, select the borders of the location to select the beginning point and edges of the desired canvassing area.
- Once complete, a new menu titled Area will appear. Select the desired users to canvass this area from the drop-down provided.
- Select Save.
- Your users will now be assigned this area within the SalesRabbit mobile app.
For more training or information regarding this feature in SalesRabbit, please contact your SalesRabbit account manager or SalesRabbit Support.
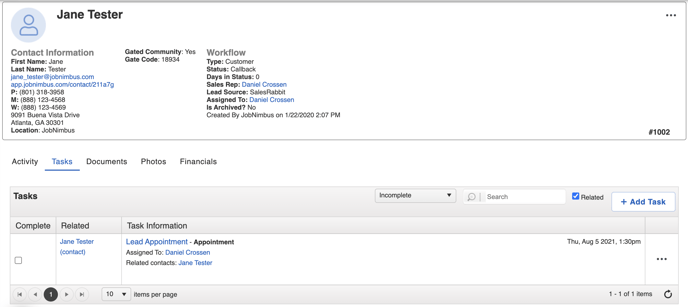
Leads and Tasks Sync to JobNimbus
Once your canvassers are onsite in the area that they are assigned to, they are able to make on-the-spot "pin-drops" with a potential lead's name, address, contact information, and notes. Additionally, they are able to input any appointments that they may have scheduled while on-site. Once this information is saved via the SalesRabbit mobile app, it immediately syncs to JobNimbus as a new lead contact with any applicable tasks.
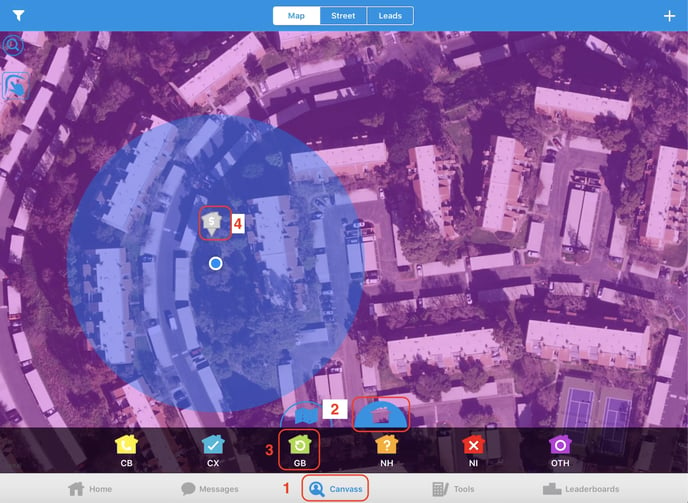
- From the SalesRabbit mobile app, select Canvass.
- To place a pin-drop for a recent lead, select the house icon.
- Assign the lead's status by selecting the corresponding icon (CB: Call Back, CX: Customer, GB: Go Back, NH: Not Home, NI: Not Interested, OTH: Other).
- Select the lead's home or property on the map.
5. To edit the information for the newly created lead, select its pin-drop.
6. Click on the pencil icon to edit the record.
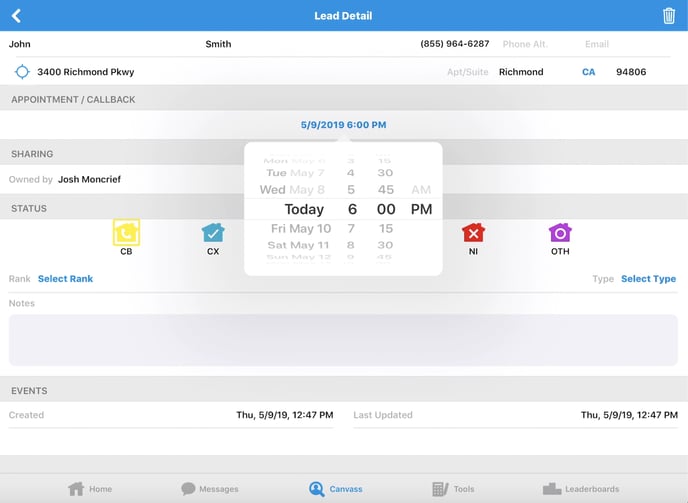
7. Input the desired contact information such as name, address, contact, contact status, notes, or appointment/call back date and time.
8. Once complete, select the back arrow in the top left of the screen. Now the Contact and Task will appear within JobNimbus, assigned to the user who created the lead.