⚠️ Effective May 1, 2024, customers will no longer have the option to process payments through WePay as the company will be discontinuing its services. ⚠️
If you would like to explore other options for payment processors, you can find more information in this article.
When you clicked the "Start Accepting Payments" button in JobNimbus Settings, you should have received an email from WePay (support@wepay.com) asking you to confirm your account.
Open this email and select "Click to Confirm".
If you can't find this email in your inbox, you can search in your spam or junk folder, or use the "Resend Confirmation Email" button in the Payments tab of your JobNimbus account settings.
This will take you to WePay's website for you to create a password for your WePay account. Enter an acceptable password, check the box to accept their terms & conditions, and click "Grant Access".
Doing this will forward you back to your JobNimbus account.
WePay portal setup
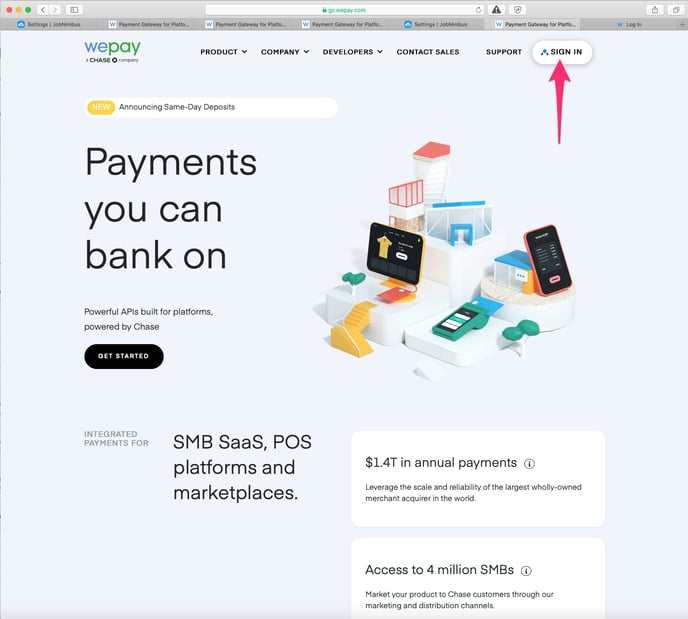
To finish setting up your WePay account, head to https://go.wepay.com/
Click "Sign In" at the top right.
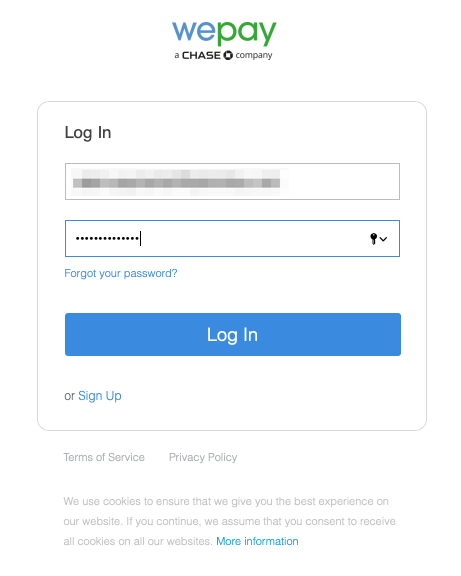
Enter your email address and password for your WePay account.
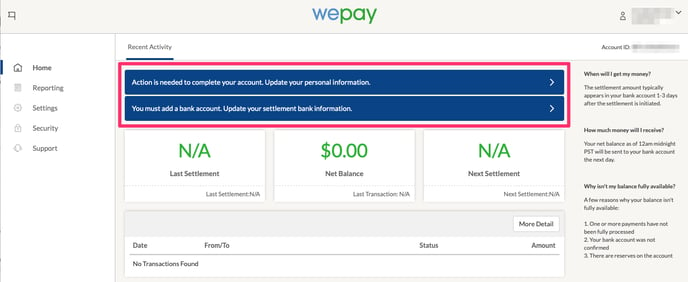
You will see 2 blue banners at the top that require action:
- "Action is needed to complete your account. Update your personal information."
- "You must add a bank account. Update your settlement bank information."
Update your personal information
Click on the top blue banner on the WePay portal's home page to update your personal information.
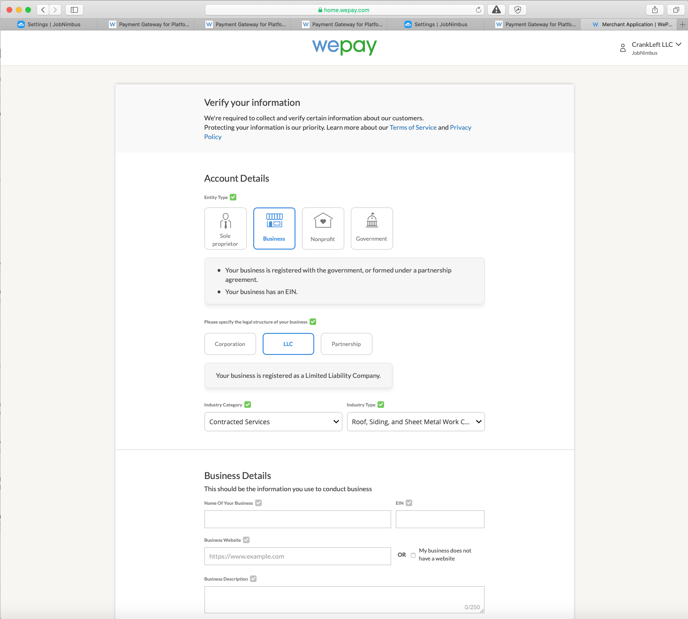
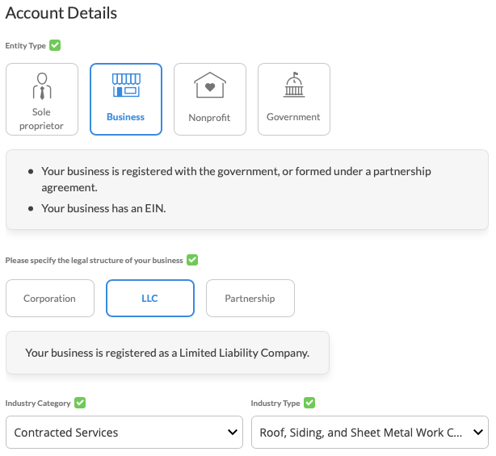
1. Account Details
- Choose your Entity Type (Sole proprietor, Business, Nonprofit, Government)
- Specify the legal structure of your business (Corporation, LLC, Partnership
- Choose an Industry Category and then an Industry Type
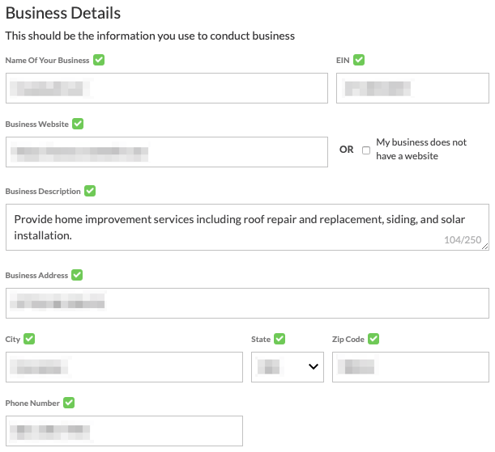
2. Business Details
- Name of your business and business EIN
- Business website
- Business description
- Business address
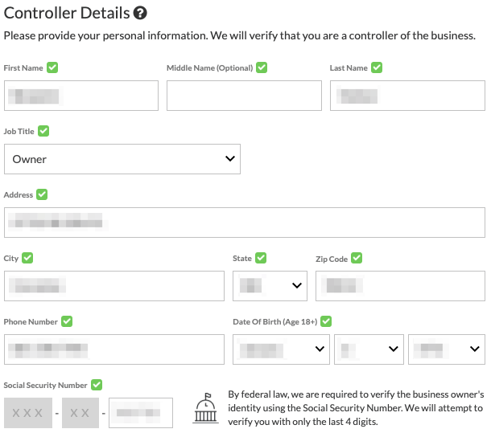
3. Controller Details
A controller is a single individual with significant responsibility to control, manage, or direct a legal entity customer, including an executive officer or senior manager (e.g., a Chief Executive Officer, Chief Financial Officer, Chief Operating Officer, Managing Member, General Partner, President, Vice President, or Treasurer); or any other individual who regularly performs similar functions (i.e., the control prong). This list of positions is illustrative, not exclusive, as there is significant diversity in how legal entities are structured.
- First Name, Middle Name (optional), Last Name
- Job Title
- Address
- City, State, Zip Code
- Phone Number, Date of Birth
- Social Security Number (last 4 digits for verification)
4. Business Owner(s)
- Do you own 25% or more of the business?
- Add more people who own 25% or more of your business
Submit
Once you're done, click "Submit" at the bottom. WePay will now verify your information and forward you to add your settlement bank information. You'll also get an email notification from WePay confirming that your new bank account was added.
Update your settlement bank information
Here, you will add the settlement details for you to withdraw funds from your WePay account into your bank account.
You will need the following information:
- Routing Number
- Account Number
- Bank Name
- Account Type (Checking/Savings)
- How often you would like WePay to send your money (Daily, Weekly, etc)
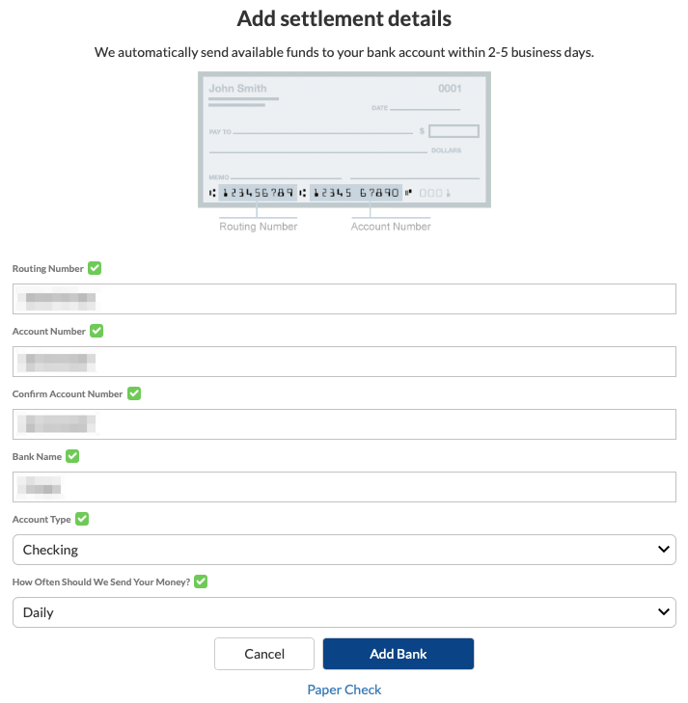
Submit (Add Bank)
Once you're done, click "Add Bank" at the bottom of the page. WePay will save your bank information and take you to their portal's home page.