On This Page
Adding a Workflow
- Click on your profile icon or initials in the top right corner and choose Settings from the dropdown menu.
- Under the Settings menu, scroll to the Workflows & Fields tab, then select either the Job, Contact, or Work Order Workflows option.
- For the purpose of this example, we will be looking at a Contact Workflow; the execution is the same as with the other Workflows.
- Click on the blue +Add workflow button.
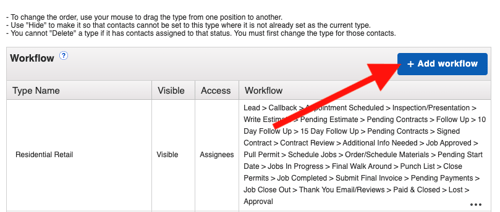
- The following window will appear, where you can edit the Workflow's details.
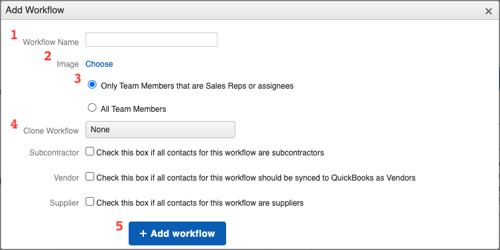
- Name your Workflow. This should help describe what your Workflow Type is, such as Residential, Commercial, or anything else that will accurately entail the type of projects that move through each Stage.
- Optionally, choose from a list of preset icons as your image to visually represent the Workflow.
- Decide who will be able to access the records who are assigned to the Workflow.
- Selecting Only Team Members that are Sales Reps or assignees will only show Contacts assigned to Statuses in that Workflow to Sales Reps or Assignees associated with that Contact.
- If a Team Member is not assigned to the Contact, they will not be able to see or search for the Contact in JobNimbus.
- Choosing All Team Members will allow everyone to assign Contacts to that specific Workflow.
- Selecting Only Team Members that are Sales Reps or assignees will only show Contacts assigned to Statuses in that Workflow to Sales Reps or Assignees associated with that Contact.
- Cloning a Workflow will allow you to duplicate one that has already been created so you can either change it slightly to fit the new Workflow, or use the same list of Statuses for two different Workflow types.
- Once you have added the Workflow details and information, click the blue +Add workflow button.
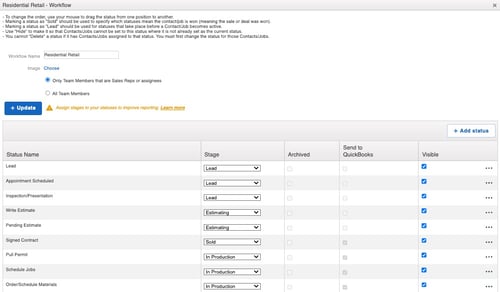
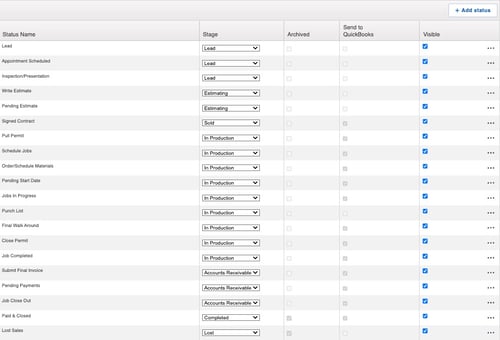
- When adding a new Status, you will be asked to link it to a Stage. This association helps in arranging the Status in a specific order, starting from Lead, Estimating, Sold, In Production, Accounts Receivable, and Completed.
- It is important to note that the Lost stage can be inserted at any point within the Workflow.
Editing a Workflow
- To edit an existing Workflow, simply click on the three dots to the right of the Workflow you would like to change and select Edit from the dropdown menu.
- From there, you can make changes to the Statuses and Stages.
Tip: New Workflows and Statuses will not automatically show in your Boards. To add your new Workflow or Statuses to your Board, follow the steps listed here once you have made the changes in your Workflow.