How do I configure Zapier automations within JobNimbus?
After you integrate JobNimbus with Zapier, you can get started creating your Zaps. When a Zapier Automation is created in JobNimbus, you can add additional conditions to make it more specific:
- Login to your JobNimbus account as a user with access to Settings.
- Proceed to the Automations tab of your JobNimbus Settings.
- Locate the existing Automation related to your Zap (typically denoted in the name with “Zapier trigger”).

- Select the rule’s action menu (…) on the right
- Select Edit.
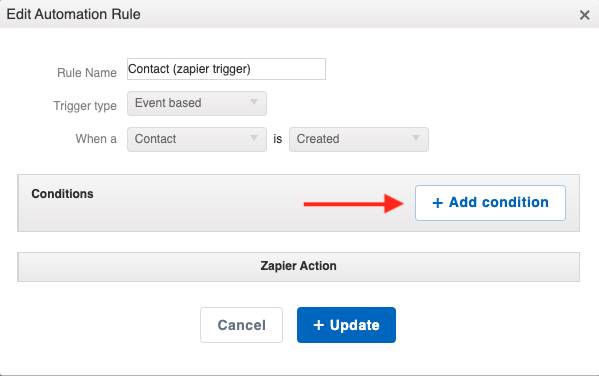
- Within the new window, select + Add Condition.

- Select your desired condition and select + Save.

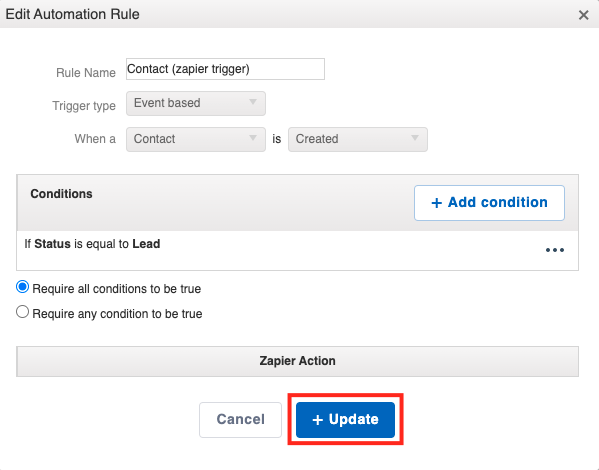
- Additional conditions may be added (optional). Once complete, select + Update.

Now, your Zap will only trigger once the primary action takes place (i,e. contact created) and the conditions for the automation have been met (i.e. “if Status equals Lead”).
To learn more about Automations, please click here.