To add a new Time-based Automation:
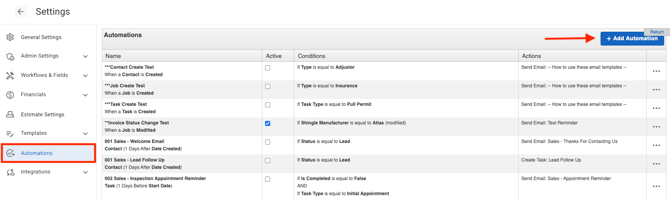
- Click on the three lines in the top left corner and choose Settings from the dropdown menu, then select the Automation tab.
- Click the blue +Add automation button
This will bring up the following window:
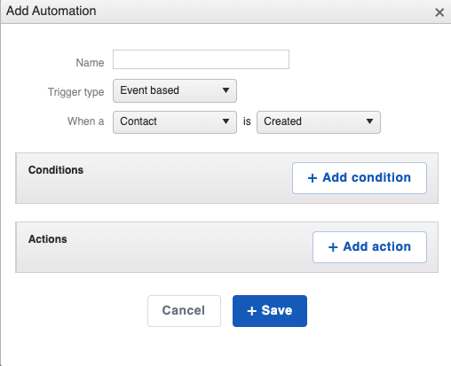
Changing the trigger type will update the Add Automation window:
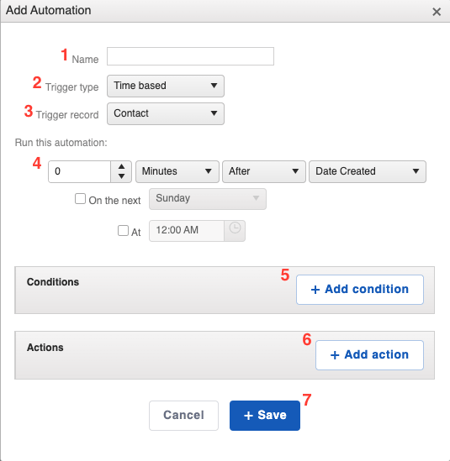
Here, you can:
- Name your Automation. Be as descriptive as possible so it's easy to locate in your list of Automations.
- Select the Trigger type by choosing "Time-based" from the drop-down menu.
- Update the Triggering Record.
- You can choose between Contact, Job, Task, Work Order, Material Order, Payment, Attachment, or Activity. Each Type will allow for different Conditions to specify how the Automation will trigger. Note that some of these Triggering Records are features that will have to be enabled before they appear in the drop-down menu.
- Specify when to run the Automation.
- You can use this section to specify how long after or before the Conditions are met to trigger the Action by the number of minutes, hours, days, weeks, months, or years. You can also specify after the record is created, updated, or another option available with specific record types.
- Add a Condition.
- The system will look to make sure these Conditions are met in order for the Automation to trigger. For example, you can add a Condition for when a Contact's "Status is Lead". When a Contact is in that Status, the Automation will trigger after the established time frame has elapsed.
- Add an Action.
- This is what is being executed once the Conditions of the Automation have been met. For example, once the Contact is in the Lead status, a Task will be created and assigned to the Sales Rep, telling them to follow up with the Contact.
- Save your Automation.
Engage: Easily add an Action to any Automation to include a text message with Engage. Follow these instructions to create Engage Text Automations.