How Do I Create an Automation To Send an Email and Create a Task After a Period of Time for a Job?
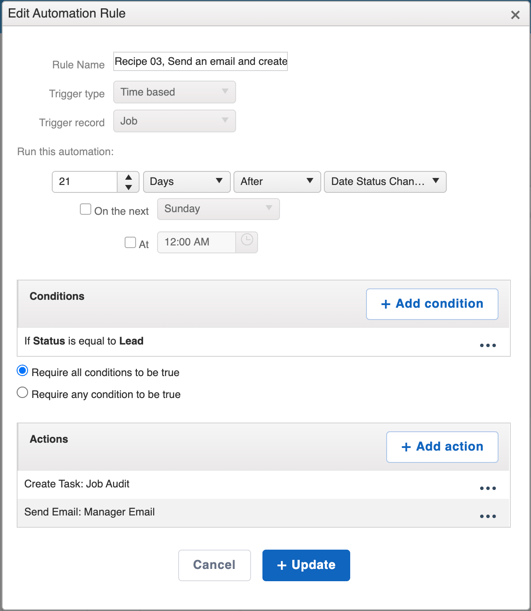
This Time-based Automation will send an email and create a task after a Job has been in a certain Status for a period of time.
Prior to setting up this Automation, create an Email Template.
Recipe:
- Choose the "Time based" trigger type
- Select the "Job" trigger record
- Run this automation: "X " (Where X is the amount of time in Minutes, Hours, Days, Weeks, Months, or Years) "After" "Date Status Changed"
- Select +Add Condition
- If Status is "Lead" (Status names may vary depending on your Workflow)
- Check the radio for "Require all conditions to be true"
- Select +Add Action
- Choose the "Create Task" Action
- Create your Task and choose the assignees, then click "Save"
- Select +Add Action again
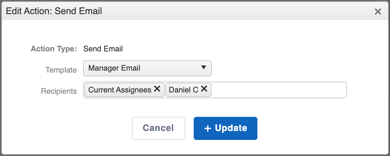
- Choose the "Send Email" action
- Select the appropriate Email Template from the drop-down menu
- Choose your Recipient (this will be the Primary Contact of the Job that is triggering the Automation) and then Save.


Engage: Easily add an Action to any Automation to include a text message with Engage. Follow these instructions to create Engage Text Automations.