How Do I Create and Edit a Document or Email Template?
Learn how to create, edit, and use Document and Email templates.
On This Page
Creating a Template
Video Overview
- Click on your profile icon or initials in the top right corner of your page.
- Select Settings from the dropdown menu.
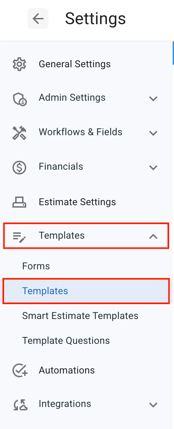
- Then, select the Templates tab, and Templates again from the dropdown.

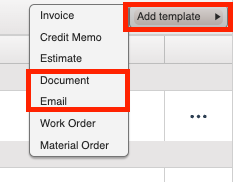
- Select the Add template button and choose either Document or Email from the dropdown menu.

- In the Template Builder, you can:

- Add a unique Template name to make it easy to locate.
- For Email Templates, add a Subject Line.
- This subject line will be included in your email when sending an email from a Job or Contact record or via Automation.
- You can personalize the content by using the Insert Template Field dropdown menu.
- Format your text (formatting details can be found below).
- Add text by clicking into the document body and typing out your document.
- View a preview of your document in the Body Preview section.
- Save your document by selecting the Add Template button.
Formatting
To format your Document or Email to better suit your needs, you can use the tools listed at the top of the Template Body.

- Format your text by selecting bold, italic, underlined, or strike-through text.
- Select the font and text size.
- Select the text color and highlight color.
- Choose your text alignment.
- Add bulleted or numbered lists and indent your text.
- Add hyperlinks.
- Add subscript and superscript.
- Insert HTML codes.
- Insert images.
- Use the table wizard to create a table.
- Use the Insert Template Field button to insert a field that will pull in customer, Job, and company information.
- You can find more detailed information about using Template Fields here.
Editing a Template
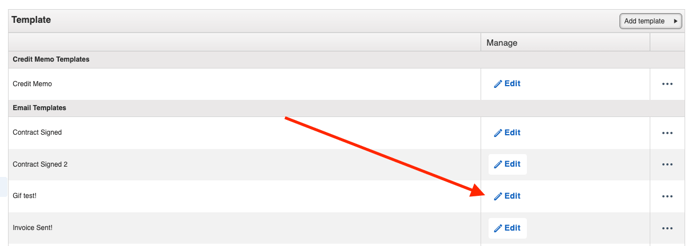
If you need to edit the template after saving the document, click on the Edit button to the right of the document.
- If you notice that your template is not reflecting the changes you've made after editing it, try refreshing your browser.

Duplicating a Template
Copy an existing template by clicking on the three dots to the right of the title and selecting Duplicate.

Using a Template
Using a Document Template
- Navigate to a Job or Contact record.
- Click on the three dots in the upper right corner of the information panel.
- Select Create Document from the action menu.

This will pull up the Document builder page:

Use the Design Template dropdown menu to select a template you have created. You can add information to the body of the document without the changes applying to the entire template.
Click Create Document when you are finished.

The document will appear under the Contact or Job's Activity tab within the Documents panel.

If you need to edit your document after creating it, click on the three dots to the right of the document and select Edit from the dropdown menu.
In this menu, you can also:
- View the document in either PDF view or in JobNimbus.
- Download the document.
- Add a signature to the document.
- Email the document, which will automatically change its status to "Sent".
- Change the Status of the document to either Draft, Sent, Signed, or Cancelled.
- Delete the document.
Note: Having the ability to delete records is dependent on your Access Profile permissions.
Using an Email Template
You can send your Email Template either directly from the customer's file or via Automation. To learn more about sending automated emails, click here.
To send the Email Template from a customer's file:
- Navigate to a Contact or Job's page.
- Click on the +Send email button under the Activity Tab.
- Choose your Template from the Insert Template dropdown menu.

Once you choose your Email Template, the information will populate and you can send the email as normal. Learn more about communicating with your customers here.
Email Templates cannot be used when Sharing a Job or Contact record or by selecting "Email Document" from the three-dot menu of a Document.