How Do I Enable the JobNimbus Integration With RoofScope?
Learn how to enable the RoofScope integration with JobNimbus.
Section 1
Within your JobNimbus account:
- Click on your Profile icon or initials in the top right corner.
- Select Settings from the drop-down menu.
- From the Integration Settings menu on the left, open the API tab.
- Select New API key.
- Under the Description column, choose ScopeTechnologies/RoofScope from the drop-down menu.
- Assign an access profile that has full Settings access.
- Select Save.

- To the right of the newly created API key, click Copy.
Section 2
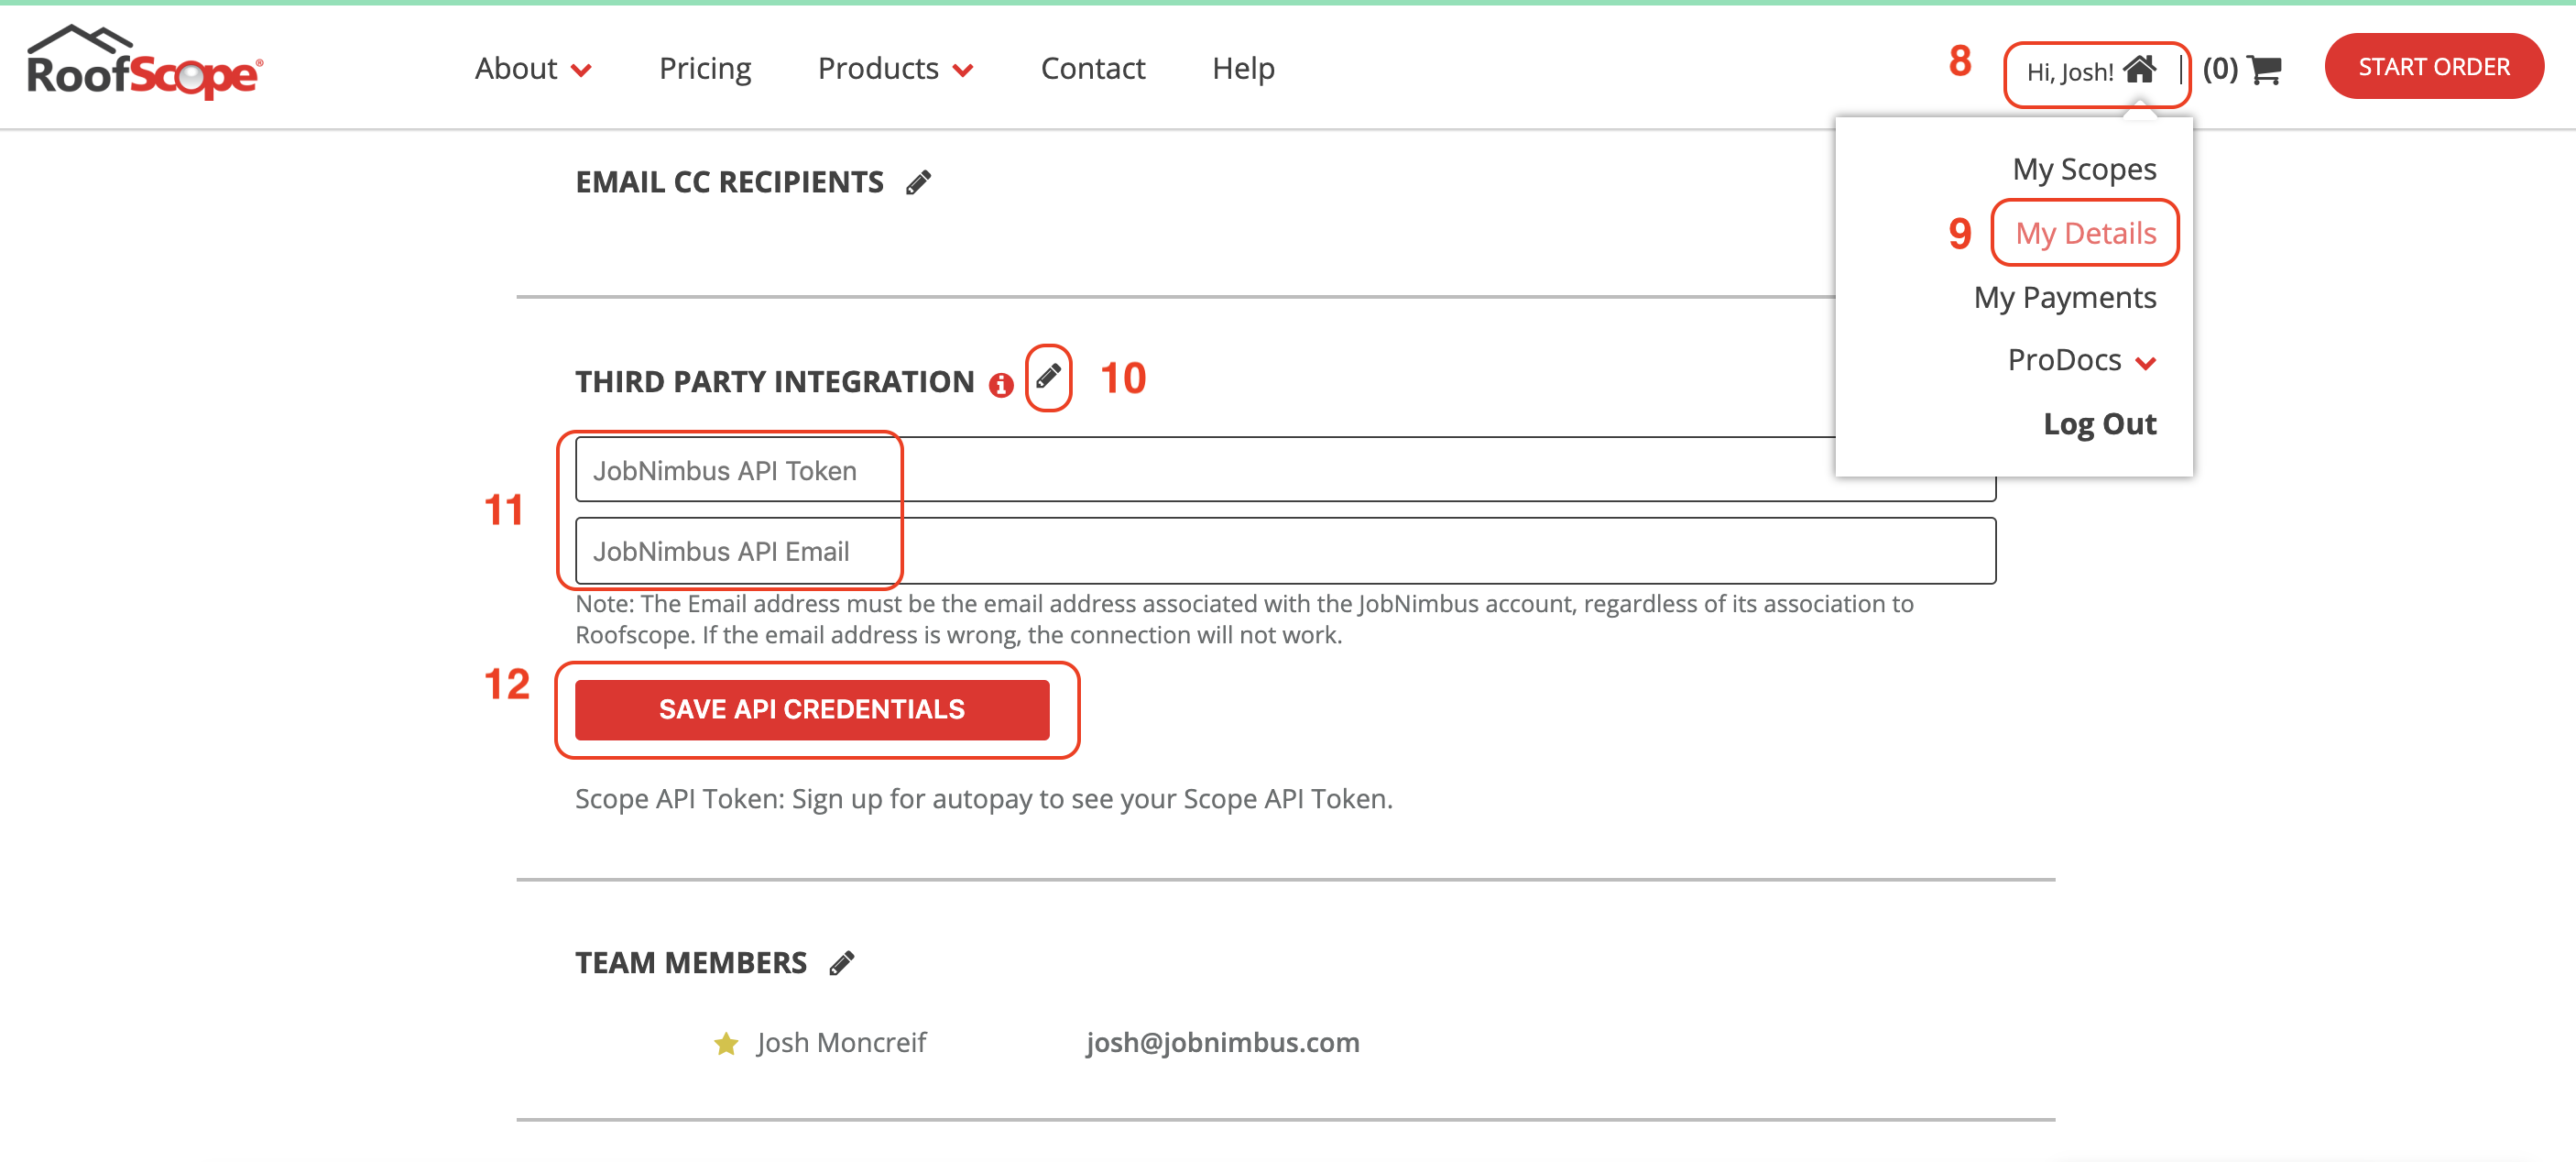
Within your RoofScope account:
- Select the drop-down menu of your name.
- Select My Details.
- Next to Third Party Integration, select the pencil icon to edit.
- Input the newly created API key that you copied in Step 8 of Section 1 above and include the email address associated with your JobNimbus account.
- This email address must belong to a user who has Settings access.
- Select Save API Credentials.

Note: The account owner in RoofScope must have autopay enabled for API integrations to be available.