To use the Leap integration with JobNimbus:
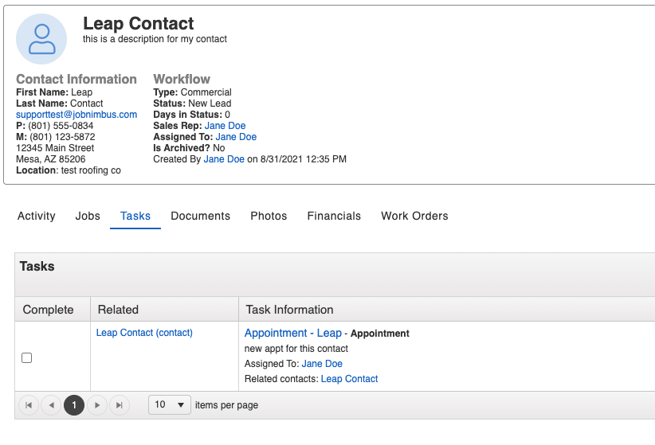
- Create a Contact (or Job) and Task within JobNimbus
- Keep in mind that the specific Type you assign to the Task must match the configurations you made for Appointments in your Leap account
- Assign both the Contact/Job record and the Task to a Sales Rep
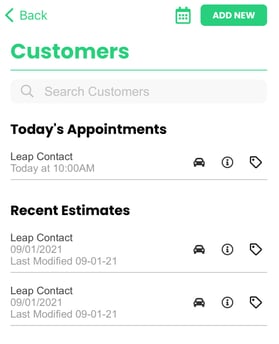
- Within the Leap mobile app, select Customers tab in the navigation menu to reveal "Today's Appointments" as well as any recently saved Estimates
- Clicking the Calendar icon will allow you to navigate through upcoming appointments
- Here, you can see the parent Contact of the Task's details by selecting the i icon, navigate to the associated address by selecting the tiny car icon, and create an Estimate by clicking on the tag icon.
Resulting an Estimate
- Whether by the "tag" icon mentioned above or through the "Estimates" tab in the menu, you'll see a similar page once you've built your Estimate.
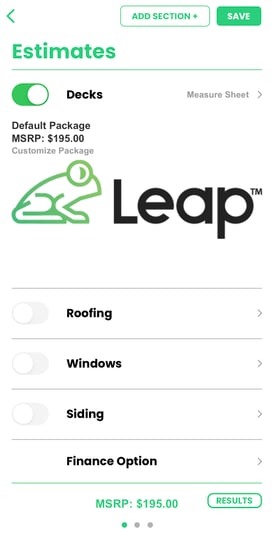
- Click on the green Results button located at the bottom right
- This will take you to a screen where you can now select the Status to which you'd like the Contact in JobNimbus to move as well as complete any other fields you may have created when configuring the integration.
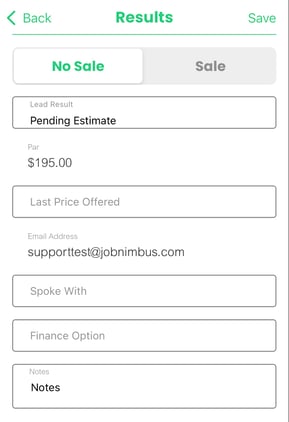
- Click Save when you are ready to send the results to JobNimbus
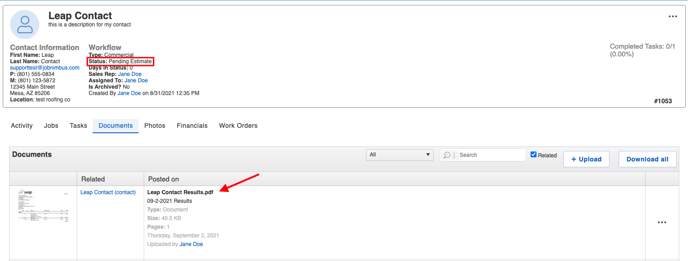
In our example, the Contact began in the Status of "New Lead". Since we had selected "Pending Estimate" when setting up the Results Sending settings, we now see that the results are located in the Documents tab of the Contact in JobNimbus and the Status has changed to "Pending Estimate":
*If you've enabled Contract, Proposal, or Report Sending during the integration setup process, created PDFs can also be synced to the Contact/Job record.
For additional resources about creating documents and navigating the mobile app, check out Leap's help center!