How Do I Filter My Inbox in Engage?
Easily Manage Your Engage Inbox with Advanced Filtering Options: Learn How to Filter Messages by Location, Sales Rep, Phone Number, and Assignee.
Filtering Your Inbox
- Select the Engage option from your JobNimbus navigation.
- Next, select the filter icon (the inverted triangle) at the top right of your Conversations tab.

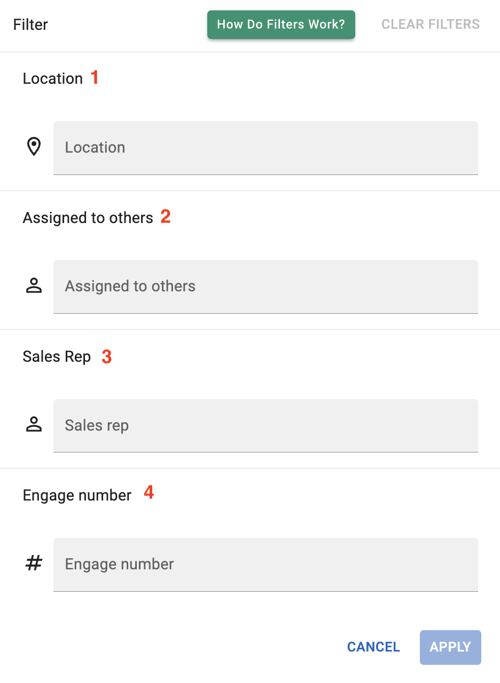
- You will now see several filtering options, including:

- Filter by company Location.
- This option will only be visible if there is more than one location in your account.
- Use the Assigned to others filter to view messages assigned to other users besides yourself in your account.
- Note: The Assigned to others filter does not apply to the Assigned to me tab.
- Filter conversations by the Sales Representative assigned to the Contact or Job.
- Filter conversations by which Engage phone number sent and received messages.
Managing Filters
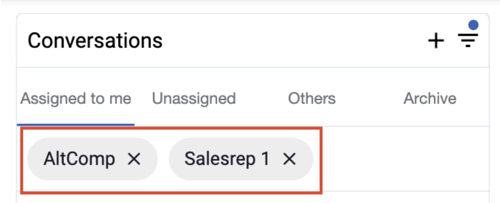
After selecting your filters, you can clear all filters by choosing Clear All from the filter icon or clicking the "X" next to a specific filter to remove it.