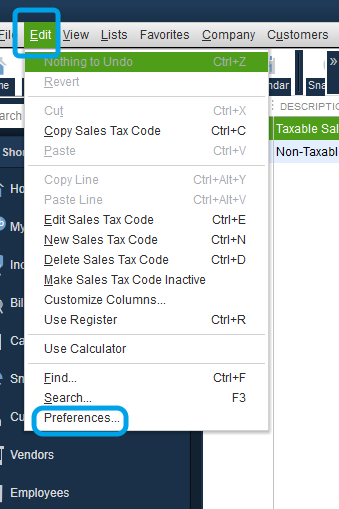
To remove the JobNimbus application from the Web Connector, follow these steps.
In your Quickbooks Desktop:
- Edit
- Preferences
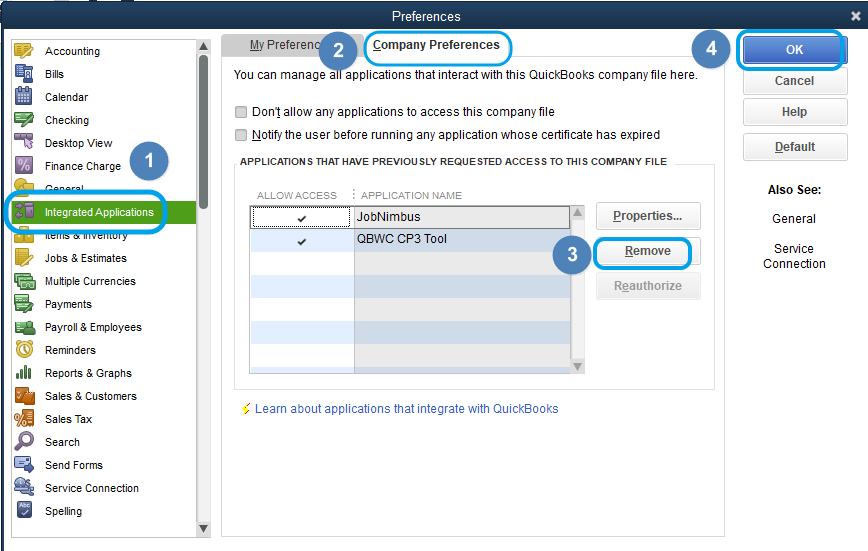
Within your QuickBooks preferences:
-
Integrated Applications
-
Company Preference
-
Remove
-
Ok
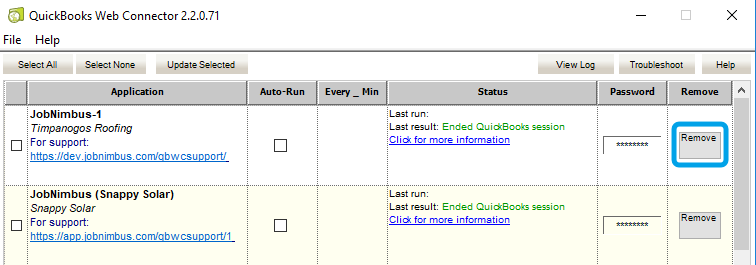
After removing JobNimbus from Integrated Applications go to the web connector ( QuickBooks=>File=>App Management=> Update Web Services) and remove the connection. On the Application area of the Web Connector note, the name "JobNimbus" is the name of the application and the company name is in italics below it. Make sure your QuickBooks company file that is open is the same name.
-
File
- App Management
-
Update Web Services
-
Select "Remove"
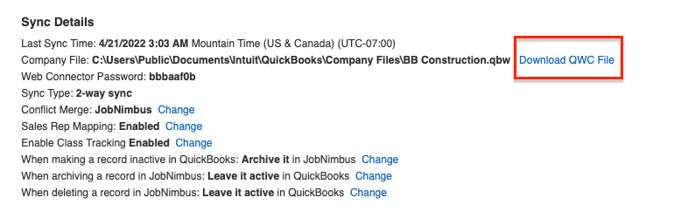
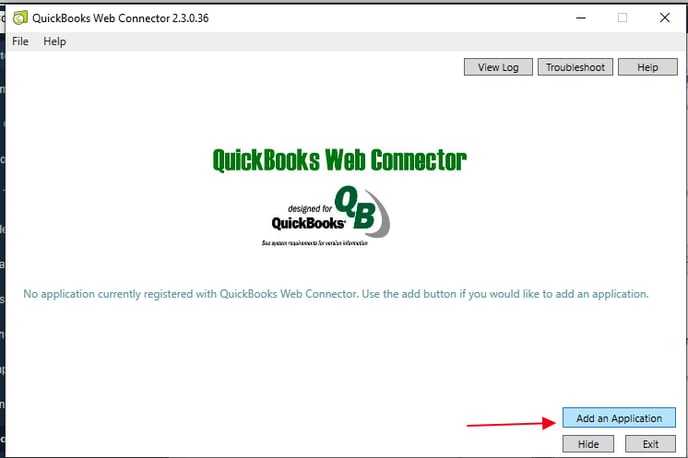
To add the JobNimbus application to the web connector:
-
Download the QWC file from JobNimbus (found in Settings=> QuickBooks=> Show setup options) or use one previously downloaded
-
From QuickBooks, open the web connector: QuickBooks=>File=>App Management=>Update Web Services (US version only)
-
Click 'Add an Application'
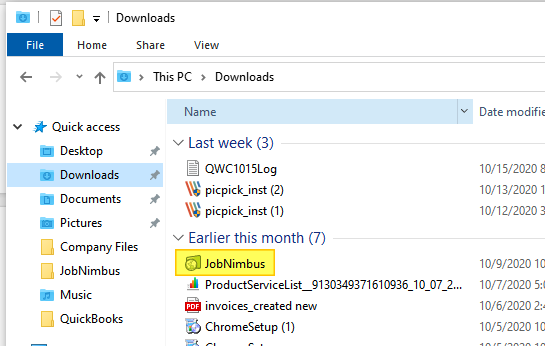
- Locate QWC file in your Downloads folder
- Copy the web connector password from JobNimbus (Settings=> QuickBooks=> Show setup options)
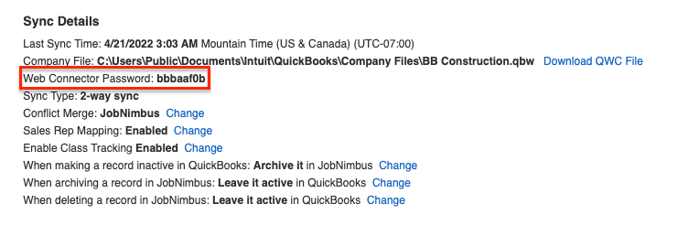
- Paste this password into the web connector
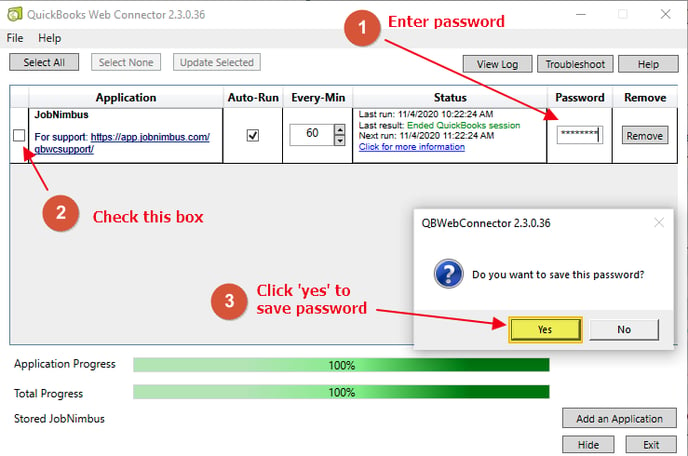
-
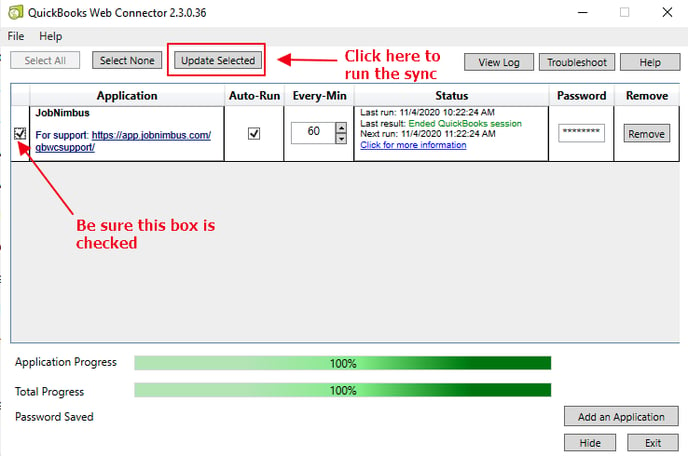
Click the box to the left of the JobNimbus application
- Hit Update Selected on the Web connector to run the sync
A common error occurs (QBWC 1039) when re-adding a QWC file to the web connector and may require the use of a CP3 tool. The following article will help you resolve this: Fix error QBWC1039