What is a Zap?
Learn about Zaps in Zapier and how to create them.
A Zap is a method of telling Zapier to move data or perform an action based on a particular trigger that consists of two or three components, depending on preference and need.
The elements of a Zap are: (1) a trigger, (2) a formatter or filter (optional), and (3) an action.
The following is an example of how to set up a Zap. In this scenario, whenever a new Google Form response adds a new row in Google Sheets, JobNimbus creates a Contact.
Set up the trigger
- Within the lefthand menu, click the Create button, then select Zaps.

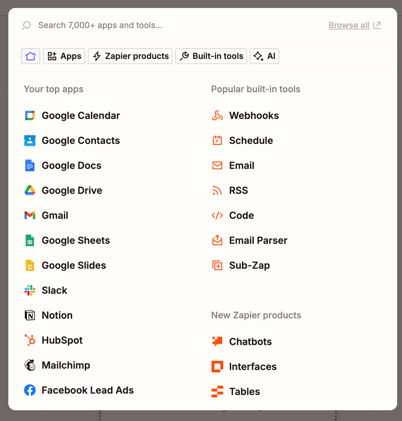
- Search for and select your Trigger App Event.

- Select the desired Trigger Event.
- Options vary depending on the chosen app.
- Click Continue.
If prompted, sign in to the account of the app to which you are connecting.
Formatters
You can apply one or many formatters between your trigger and action to help mold your data to each system's needs. You can set up a formatter to convert, splice, or alter your data into various formats.
- On the "Add Action" screen, select Formatter.

- Choose your formatter using the Action Event dropdown.

- Select the data field you are interested in and how you would like that data formatted.
- Depending on the formatter option chosen, the available fields and transformation methods may vary.

- Depending on the formatter option chosen, the available fields and transformation methods may vary.
- Test the formatter.
Filter
Another option is to set up a filter for your data. This can be a condition that a field must meet before the Zap can continue.
- On the "Add Action" screen, select Filter.

- Select the desired conditional statements by selecting a field, condition, and desired value, if applicable.

- Test the filter.
Delay
You can also add a delay to when your zap will execute the chosen action(s).
- On the "Add Action" screen, select Delay.

- Select the desired conditional statements by selecting a field, condition, and desired value, if applicable.

- Test the filter.
Setting Up Your Secondary Action
At this stage in the Zap, you will select how your data will map from either the trigger or format and how JobNimbus will input that data into the system.
Note: A Zap must have at least one trigger and one action; however, it can have multiple actions.
- Choose your App Event

- Select your desired app-specific Event.
- Options vary depending on the chosen app.

- Confirm the connected account (if prompted).
- Map the desired fields from the data input into the action fields.
- Set up the action by filling in the data you wish to create once the Zap is triggered.
- Repeat the above step as necessary until all desired fields are mapped.
- Test & Review, Test & Continue, or Skip Test to move forward.

- At the bottom of the action, you can select Turn on Zap by selecting the Publish button.

Congratulations!
Your Zap has been created. You can always find a list of your active and drafted automations under the Zaps tab of the Dashboard menu on the left hand side of your Zapier account.
