How Do I Enable the Integration with mySalesman?
This article outlines how to create a JobNimbus API key and plug it into your mySalesman account.
Note: A mySalesman account is required in order to integrate with JobNimbus. Visit their website to book a demo or start your membership (free for 30 days).
In Your JobNimbus Account
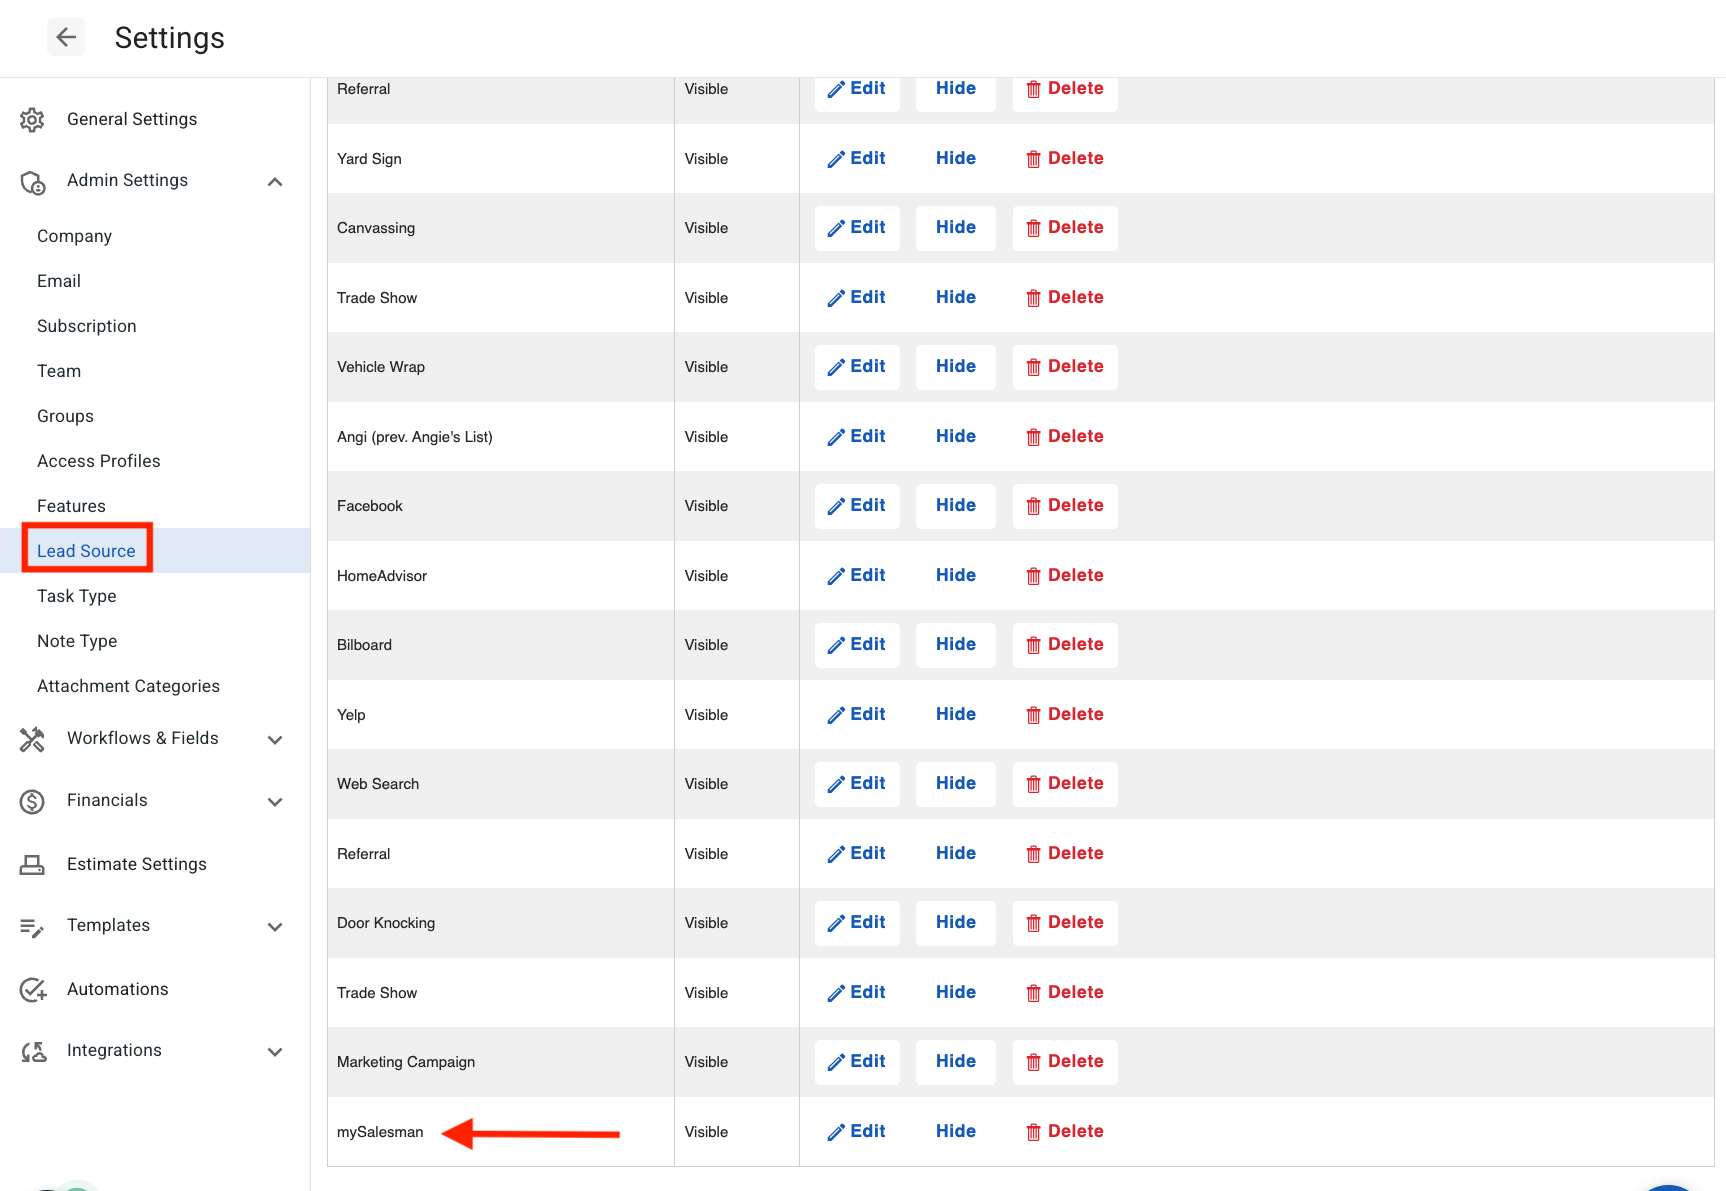
Create Lead Source
- Click on your profile icon or initials in the top right corner
- Select Settings from the drop-down menu
- In the Admin Settings menu, choose Lead Source from the options on the left-hand side.
- Select the option to add a lead source by clicking on the "+Add lead source" button located in the upper right corner.
- Lead Source for mySalesman must be typed in with exact capitalization
- If the Lead Source Name is not entered accurately, the budgets will not be transferred to JobNimbus

Create API Key
- Click on your profile icon or initials in the top right corner
- Select Settings from the drop-down menu
- In the Settings menu on the left, open the API tab
- Click on the New API key button

This will pull up the option to create a new API key. 
Once here:
- Choose mySalesman from the drop-down menu under the "Description" column

- Select a profile with full access (ex: "Admin") under the Access Profile column

- Click Save
- Copy the newly created key

Ensure that you keep the capitalization of "mySalesman" exactly as it is to prevent any errors during the integration process
In Your mySalesman Account
Set up mySalesman client for integration:
- Navigate to the "myBusiness" page
- Under the Admin Controls panel, check the box next to Enable JobNimbus
- Note: Admin must enable JobNimbus for client within the Admin Controls panel.
- Paste the API key you generated and copied (see step 4 above) from JobNimbus into the JobNimbus credentials field

- Save your settings
Tips:
- Please allow up to 15 minutes for the changes to be implemented. Going forward, any budgets that are completed for the clients you have configured will automatically be uploaded to JobNimbus.
- For more information on how to use the integration, please refer to this article.