On This Page
Note: Your Contacts or Jobs must have a valid property address entered for the integration to function properly.
Creating an Estimate with QXO
- Navigate to a Job and select the Financials tab.
- Click the +Create button at the top of the page.
- Select the Connect Supplier button at the top right of the Estimate page.

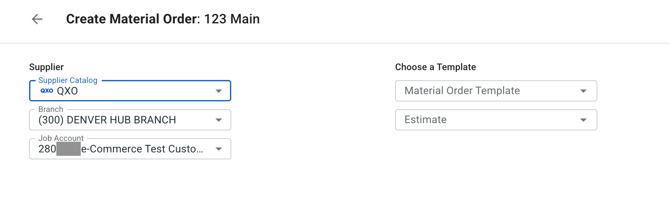
- Select QXO from the Supplier dropdown menu, the desired Branch from the Branch dropdown, and the Account from the Account dropdown.

-
- If you have imported any templates, select one from the Use Template dropdown menu.
- To Add items, start typing in a product name in the Item text field.
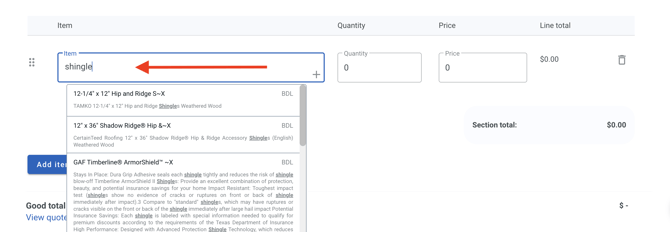
- An item will display a default price when entered, which is the median price of the item options available.
- This will update to the item's actual price once a specific item option has been selected.
- Once you have added the desired items, you can move on to building the rest of your Estimate.
Converting an Estimate to a Material Order
- On the Financials tab under the Job, select the three dots next to the Estimate you want to convert.
- Under the Convert to section, select Material Order.
- You will then be taken to the Create Material Order screen.
- Make any changes you would like to make by updating the information in the Line Items.
- At the bottom of the page, set the Delivery Address, the Requested Delivery Date and Time, and the Shipping Method.
- The Delivery Address will automatically fill in the Job address, but you can edit this if needed.
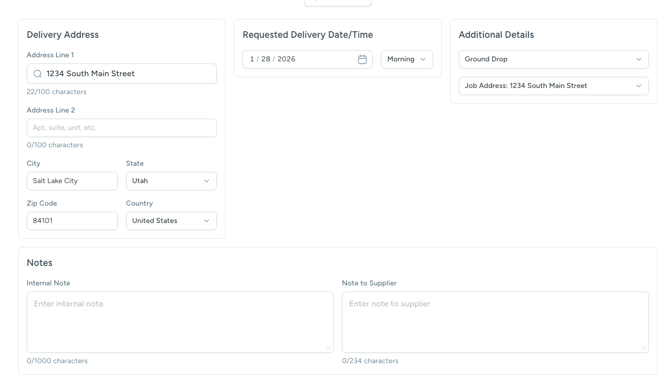
- The Delivery Address will automatically fill in the Job address, but you can edit this if needed.
- Click Place Order in the top right corner.
Tips:
- A successful order will take you to a preview of the Material Order and in the Activity show you a Status of Order Received.
- Once the order is placed, you will receive a confirmation email from QXO with the details. The chosen Material Order delivery date will the display on your Calendar within JobNimbus.