Note: This is for Legacy Invoices only. For creating Invoices in the New Invoice Experience, click here.
Creating an Invoice
- Navigate to a Contact or Job's page
- Select the Payments & Invoices tab
- Click the + Create button and select Invoice

This will pull up the Invoice Builder.
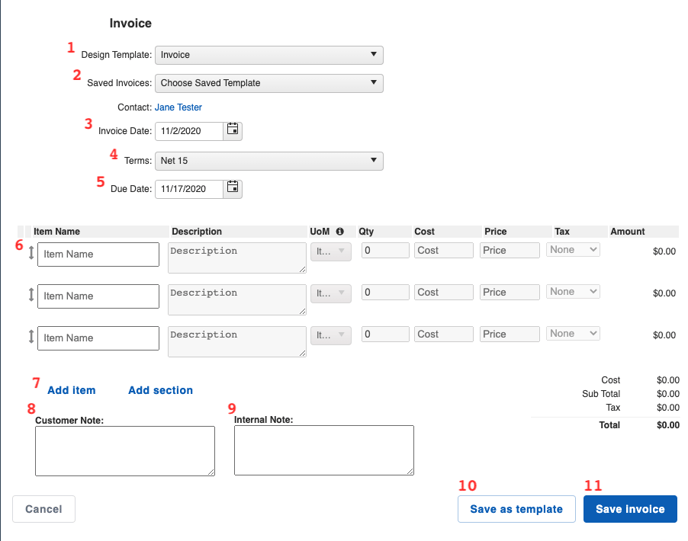
Here, you can:
- Choose a Design Template you have previously created in the Templates section of your Settings.
- Choose a Saved Invoice you have previously created and saved.
- Configure the Invoice Date.
- Update the Terms for your invoice to indicate the agreement on how the payments will be made.
- Note: these options are the system's default and cannot be customized.
- Add a due date for when the Invoice should be paid in full.
- Tip: choosing a specific "Term" (i.e. Net 15) will automatically update the due date to reflect [X] amount of days after the Invoice Date. Choosing the "Custom" Term allows you to set your own due date.
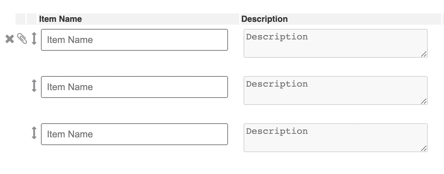
- Enter line items.
- The information in these fields pull from your Products & Services. If you have not yet added the item to your Products & Services, you can click on "Add New Product", which will pull up a window to create and save the product to your account.
- While hovering over the line item, the options to delete that line item or add an image to the line item appear.
- Add another line item or a new section.
- Sections can help you separate your line items into specific groups.
- Add a Customer Note.
- This note will appear at the bottom of your Invoice under the note's title and is visible to the recipient.
- Add an Internal Note.
- This note will appear in the Invoice description when you view it in JobNimbus and is only visible to your team.
- Save your Invoice as a template.
- This will allow you to save the Invoice, with all of its line items and totals, to be used later. When creating a Saved Invoice Template, you will be prompted to give the template a name. Then, it will appear in the Saved Invoices drop-down for the next time you need to create the same document.
- Save your Invoice.
- This will take you to the document viewer, so you can see how it will look for your customers. It will also be saved under the related record's Financials tab.
- This will take you to the document viewer, so you can see how it will look for your customers. It will also be saved under the related record's Financials tab.
Tip: you can convert an existing approved Estimate into an Invoice to save time by avoiding manual entry. Learn more about this here.